
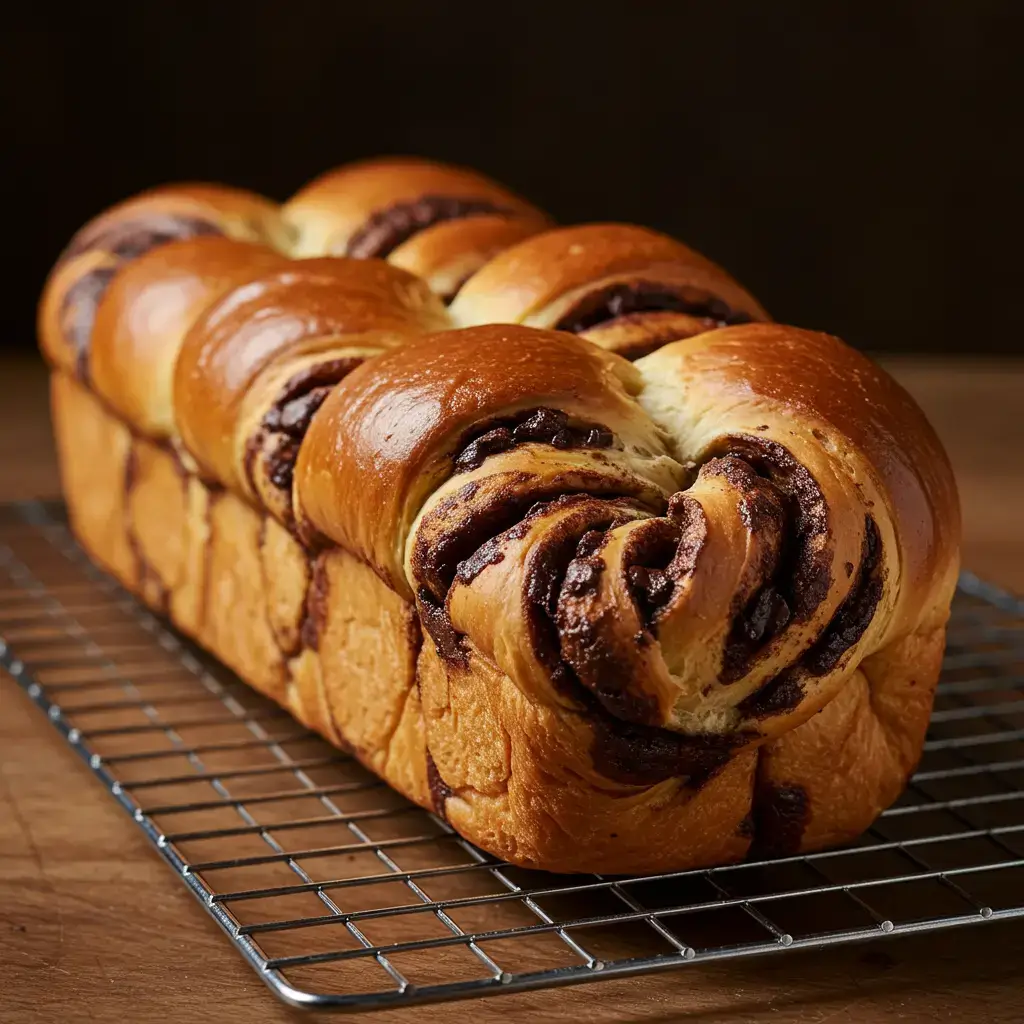
There’s something truly magical about the aroma of freshly baked braided chocolate chip brioche filling your kitchen. This soft, buttery, and slightly sweet bread is a classic French pastry, known for its delicate texture and stunning braided design. With every bite, the rich flavor of butter-rich dough meets the melty goodness of chocolate chips, creating a treat that’s perfect for breakfast, brunch, or even dessert.
But here’s the best part—you don’t need to be a professional baker to make it! This easy-to-follow recipe will guide you through the process, from kneading the yeast dough to mastering the perfect braid. Whether you’re enjoying it warm with a cup of coffee or toasted with a spread of butter, this homemade brioche is sure to impress. So, why not give it a try and bring a little bakery-style goodness into your home? Let’s get started!
What is Brioche and Why You’ll Love This Recipe
What is Brioche?
Brioche is more than just bread—it’s a luxurious treat that’s rich, buttery, and wonderfully soft. It has a unique texture that’s slightly sweet, making it perfect for both savory and sweet dishes. The dough is made with lots of butter and eggs, which gives it that melt-in-your-mouth softness and delicate flavor.
This classic French bread is a versatile favorite, whether you’re using it for sandwiches, French toast, or just enjoying it on its own with a bit of jam. The key to its fluffy texture lies in the dough’s careful preparation. Proofing the yeast and letting the dough rise properly is crucial for achieving that light, airy consistency.
If you’ve never tried making homemade brioche before, you’re in for a treat! While the process might seem a bit involved, the end result is totally worth it. Plus, the aroma of fresh-baked brioche filling your home is nothing short of magical. Ready to dive in? Let’s get baking!
Why Add Chocolate Chips?
Chocolate chips are the perfect addition to brioche, transforming it from a simple bread into a decadent treat. They add bursts of sweetness that perfectly complement the buttery richness of the dough. Each bite is a delightful mix of soft, fluffy bread with pockets of warm, melty chocolate.
But it’s not just about the sweetness. The chocolate chips also enhance the overall flavor profile, adding depth and contrast. The slight bitterness of dark chocolate, for example, balances the sweetness of the bread and keeps it from being overly sugary.
If you love a chocolatey twist, adding chocolate chips to your braided brioche elevates it to another level. You can choose dark, semi-sweet, or even milk chocolate chips based on your preference. No matter which you pick, the result will be a perfect blend of rich, buttery dough and chocolatey goodness that’s hard to resist.
So, if you’re wondering whether or not to add the chocolate chips, my advice is—go for it! You’ll love the extra flavor boost they bring to this already delicious homemade brioche.
Why Braid the Dough?
Braising your dough is about more than just looks—it has practical benefits, too! First off, it creates a stunning presentation. The intricate braid gives your braided chocolate chip brioche that beautiful, professional appearance. When it’s baked, the golden strands of bread are woven together, making it the star of any table.
But it’s not just about the aesthetic. Braiding also ensures that the dough bakes evenly. As the strands cook, the heat circulates more evenly through the loaf. This helps your brioche dough rise perfectly, creating a light, airy texture. You’ll get that soft, fluffy interior and golden, crisp exterior that makes brioche so irresistible.
Plus, braiding helps the dough stay together. It keeps everything in place while it rises, preventing the bread from spreading too much. The result is a loaf that holds its shape beautifully and is easier to slice.
In short, braiding your dough is a simple step that adds both flair and functionality to your recipe. It’s easy, and it makes your homemade brioche look and bake like it came from a professional bakery. So, go ahead and give it a try—it’s fun and rewarding!
Ingredients You’ll Need for Braided Chocolate Chip Brioche
Essential Ingredients for Braided Chocolate Chip Brioche
To make the best braided chocolate chip brioche, you only need a few key ingredients, all easily found at your local grocery store:
- Flour: All-purpose flour provides the structure and soft, fluffy texture. Add some bread flour for extra softness.
- Active Dry Yeast: This helps the dough rise and gives the brioche its light, airy texture. Activate it with warm water and sugar, or use instant yeast.
- Eggs: Eggs add richness, moisture, and a golden color. Use room temperature eggs for the best results.
- Butter: Softened butter makes the brioche rich, tender, and flaky.
- Sugar: A small amount balances the butter’s richness and enhances the chocolate’s sweetness.
- Milk: Whole milk helps create a smooth, soft dough with added tenderness and flavor.
- Salt: A pinch of salt balances sweetness and enhances the flavors of the other ingredients.
These ingredients come together to form a rich, fluffy dough that’s ready to be braided and baked into something special! Now, let’s get baking!
Why Use an Egg Wash?
An egg wash is the secret to achieving that perfect golden-brown crust on your braided chocolate chip brioche. When you brush the loaf with a mixture of beaten eggs and a splash of milk or water, it gives the dough a glossy, rich finish that not only looks beautiful but also enhances the texture.
The egg wash helps the brioche dough brown evenly as it bakes, creating a mouthwatering crust that’s both crisp and tender. Without it, your loaf might not get that signature, bakery-style shine. Plus, it adds a subtle richness to the flavor, complementing the buttery dough and sweet chocolate chips.
Here’s a tip: For an even more indulgent finish, you can add a light sprinkle of sugar over the egg wash before baking. It will give your brioche a slight sweetness and extra sparkle that’s hard to resist.
An egg wash is an easy step that transforms your homemade brioche into a showstopper. So don’t skip it—this small step makes all the difference in the final presentation and taste. Ready to brush on that shiny coat and pop your loaf in the oven? Let’s do it!
Choosing the Best Chocolate Chips
One of the best parts of making braided chocolate chip brioche is choosing the perfect chocolate to add. The type of chocolate chips you use can totally transform the flavor of your bread, so let’s talk options!
First, you have dark chocolate. Dark chocolate chips have a rich, slightly bitter flavor that balances beautifully with the buttery sweetness of the brioche dough. If you’re someone who loves a more complex, intense chocolate taste, dark chocolate is the way to go.
Then, there’s semi-sweet chocolate. This is the perfect middle ground. Semi-sweet chips offer that classic sweetness without being overwhelming, which is ideal for brioche bread. It brings the best of both worlds, giving you a harmonious blend of sweet and rich chocolate in every bite.
If you have a sweet tooth, milk chocolate chips are your best friend. These chips melt beautifully, creating a creamy, sweet flavor that’s perfect if you want your brioche to have a more dessert-like appeal. Milk chocolate will definitely add a softer, sweeter bite compared to the more robust options.
For a little extra flair, feel free to mix different types of chocolate! Combining dark, semi-sweet, and milk chocolate chips will give you a variety of textures and flavors, making each slice of your chocolate chip brioche a new experience.
Ultimately, the choice is yours. Whether you prefer a richer bite with dark chocolate or something smoother with milk chocolate, the right chips will make your homemade brioche even more irresistible. So, go ahead and choose the chocolate that speaks to your sweet tooth—it’s all about personal preference!
Step-by-Step Instructions to Make Braided Chocolate Chip Brioche
1. Prepare the Brioche Braided Chocolate Chip Brioche
Start by mixing all your ingredients together. In a large mixing bowl, combine the flour, active dry yeast, sugar, and a pinch of salt. Next, add the milk, eggs, and butter, then mix everything until it forms a dough. At first, it will be sticky, but don’t worry!
Once your dough has come together, it’s time to knead. Transfer it to a lightly floured surface and knead for about 8-10 minutes. You want the dough to become smooth and elastic, and it should pass the “windowpane test” (when you stretch a small piece of dough, it should form a thin membrane without tearing).
Once kneaded, place the dough in a lightly oiled bowl, cover with a damp cloth, and let it rest in a warm spot for about 1-2 hours. The dough should double in size during this time, which means it’s ready for the next step!
2. Incorporate Chocolate Chips and Proof the Dough
After your dough has risen, gently punch it down to release the air. Now it’s time to fold in the chocolate chips. Sprinkle them over the dough and carefully knead them in, ensuring they’re evenly distributed.
Once the chocolate is incorporated, divide the dough into three equal portions and shape them into ropes. Let the dough rest for another 10-15 minutes while you prepare the braiding.
For the best results, give your dough another round of proofing after braiding. Cover it with a kitchen towel and let it rise for 30-45 minutes. You’ll know it’s ready when it’s puffed up and looks almost doubled in size.
3. How to Braid Brioche Dough
Now comes the fun part—braiding! Start by lining up the three dough ropes side by side. Pinch the tops together to hold them in place.
For the braid, take the right strand and cross it over the center, then take the left strand and cross it over the new center. Keep alternating the sides until you reach the end of the dough.
Once braided, pinch the ends together and tuck them under the loaf to secure the braid. This step helps the dough hold its shape while it bakes.
4. Baking and Final Touches
Before popping your braided brioche into the oven, it’s time to brush it with an egg wash. This is a mixture of beaten egg and a little milk that will give your brioche that signature golden brown crust and glossy finish.
Preheat your oven to 350°F (175°C), and bake the brioche for 25-30 minutes, or until the top is golden and a toothpick comes out clean. Keep an eye on it during the last few minutes to make sure it doesn’t over-brown.
Once baked, let your braided chocolate chip brioche cool slightly before slicing. The perfect balance of buttery richness and melted chocolate is now ready to enjoy!
Tips for the Best Homemade Braided Chocolate Chip Brioche
How to Prevent a Dense Brioche: Kneading and Proofing Tips
If you’ve ever baked brioche and ended up with a dense loaf, don’t worry—there are a few key steps that can ensure your brioche turns out soft, fluffy, and light. The secret? Proper kneading and proofing. Here’s how you can avoid a dense loaf and create a perfect light brioche every time.
Kneading Tips for Soft Dough
The first step to a light and airy brioche is thorough kneading. Kneading helps develop the gluten, which is essential for that soft, fluffy texture. When you’re kneading your dough, aim for about 8-10 minutes of work. The dough should go from sticky and rough to smooth and elastic.
One of the best ways to know if you’ve kneaded enough is the “windowpane test.” Take a small piece of dough and gently stretch it between your fingers. If it forms a thin, translucent sheet without tearing, you’ve kneaded enough. If it tears, continue kneading for a few more minutes.
Let the Dough Rest: The Proofing Process
Proofing is just as important as kneading when it comes to getting a fluffy brioche. After kneading, let your dough rise in a warm, draft-free area. A slow rise gives the dough time to develop flavor and texture. It also helps the yeast do its job, making the dough light and airy.
For the first rise, cover your dough with a damp cloth or plastic wrap and let it rest for 1-2 hours. You’ll know it’s ready when it has doubled in size. Don’t rush this step; it’s tempting to move on quickly, but letting it rise properly is essential to preventing a dense loaf.

Second Proofing for the Perfect Loaf
After shaping and braiding your dough, it’s time for the second proofing. This final rise can be just as important as the first. Let your braided dough rest for 30-45 minutes, covered with a towel. The dough should puff up nicely. If it doesn’t, give it more time to rise. A second rise ensures a light and airy crumb inside the loaf, while also helping the bread maintain its shape.
Bonus Tip: Don’t Overwork the Dough
While kneading and proofing are essential, overworking the dough can result in a denser texture. Avoid punching the dough too hard or handling it too much after it’s risen. The goal is to keep as much air in the dough as possible, so handle it gently when shaping and braiding.
By following these tips—kneading thoroughly, proofing well, and handling the dough gently—you’ll be on your way to a soft, fluffy brioche that’s anything but dense. Happy baking!
Can You Freeze Braided Chocolate Chip Brioche? Best Storage Methods for Freshness
The short answer is yes—you can absolutely freeze braided brioche! In fact, freezing is a fantastic way to preserve the freshness of your homemade brioche without sacrificing flavor or texture. Let’s walk through the best ways to store your brioche so it stays just as soft and delicious as the day you baked it.
Freezing Braided Brioche: Before or After Baking?
You have two options when it comes to freezing your braided brioche: freeze it before baking or after.
- Freezing Before Baking: If you want to prepare your brioche in advance, freeze it after you’ve braided the dough and completed the first proofing. Once braided, cover the dough with plastic wrap and place it in a freezer-safe bag or airtight container. When you’re ready to bake, simply remove it from the freezer and let it thaw in the fridge overnight. Then, allow the dough to undergo its second proofing before baking. This method ensures that your brioche will rise beautifully and bake just like fresh dough.
- Freezing After Baking: If you want to save the final product, let your brioche cool completely after baking. Then, wrap it tightly in plastic wrap, followed by a layer of aluminum foil. This will prevent freezer burn and keep your chocolate chip brioche fresh. When you’re ready to enjoy it, let it thaw at room temperature, or warm it up in the oven for a few minutes to bring back that soft, fluffy texture.
How to Store Your Frozen Brioche for Maximum Freshness
For both methods, proper storage is key to keeping your brioche in its best condition. Make sure your brioche is tightly wrapped in either plastic wrap or a resealable freezer bag to prevent air from getting in. You can even double-wrap for extra protection!
When storing, remember to label your packages with the date so you know how long it’s been in the freezer. Frozen braided brioche will stay fresh for up to 3 months. After that, the quality may begin to decline, although it should still be safe to eat.
Thawing and Reheating Tips
When it’s time to thaw your braided brioche, the best method is to let it slowly come to room temperature. If you froze it before baking, follow the steps above to allow it to finish proofing before baking. If it’s already baked, you can either let it thaw overnight in the fridge or warm it in a 300°F oven for about 10-15 minutes to refresh the crust.
Freezing doesn’t have to mean sacrificing flavor. With these simple tips, you can enjoy freshly baked chocolate chip brioche whenever you like—whether it’s the next day or weeks down the road. Happy baking and freezing!
How to Serve Brioche: Best Pairings for a Perfect Meal
The beauty of braided chocolate chip brioche is that it’s so versatile, and there are endless ways to enjoy it. Whether you’re having it for breakfast, brunch, or dessert, the options for pairing brioche are endless and oh-so-delicious. Here are some ideas to help you take your homemade brioche to the next level.
Classic Butter and Jam
For a simple yet delightful option, slather a warm slice of brioche with a generous spread of butter. The butter melts into the soft, fluffy dough, creating a rich, comforting bite. You can elevate it even further by adding your favorite jam or fruit preserves. Think strawberry, raspberry, or even a decadent apricot jam. The sweetness of the jam contrasts perfectly with the buttery brioche, making each bite irresistible.
Coffee and Brioche: A Match Made in Heaven
There’s nothing quite like enjoying a slice of chocolate chip brioche with a warm cup of coffee. The deep, rich flavors of coffee pair beautifully with the sweetness of the brioche, creating a perfect balance. Whether you prefer a strong espresso, a creamy latte, or a cozy cup of French press coffee, the combination is guaranteed to start your day on a delicious note.
Brioche with Whipped Cream or Mascarpone
Looking for something extra indulgent? Top your brioche with a dollop of whipped cream or mascarpone cheese. These creamy toppings add richness and balance out the sweetness of the chocolate chips. You can even drizzle a bit of honey or maple syrup for an added touch of sweetness. This makes for a luxurious dessert or brunch treat that will leave everyone asking for more.
Fresh Fruit Pairings
To balance out the richness of the brioche, serve it alongside fresh fruit like berries, sliced bananas, or even a citrus medley. The freshness and juiciness of the fruit contrast wonderfully with the soft, buttery bread. If you’re feeling adventurous, add a little lemon zest or a sprinkle of cinnamon to elevate the flavor profile further.

Brioche French Toast
If you’ve got leftover braided brioche, turn it into the most decadent French toast! Simply slice the brioche, dip it in a mixture of eggs, milk, and cinnamon, then fry it up in a hot pan. Serve with fresh berries, a dusting of powdered sugar, and a drizzle of maple syrup for a breakfast that’s both luxurious and comforting.
Common Mistakes and Troubleshooting Brioche Dough
Why is My Brioche Dough Too Sticky? How to Fix It
If you’ve ever made brioche dough and found it to be too sticky, you’re not alone! It’s a common issue, especially since brioche dough has a higher fat content than most bread doughs. But don’t worry—there are easy ways to fix it, and with a little know-how, you can get your dough in perfect shape.
Understanding Why Brioche Dough is Sticky
First, let’s take a moment to understand why your dough might be sticky. Brioche is a rich, buttery bread that includes ingredients like eggs, milk, and plenty of butter. These ingredients make the dough soft and tender, but they can also make it a bit more challenging to handle, especially in the early stages of mixing. Additionally, humidity, temperature, and even the type of flour you use can affect the dough’s texture, making it feel stickier than expected.
Tip 1: Add More Flour (Gently!)
One of the easiest fixes is to add more flour to your dough. If it’s sticking to your hands or the surface, gradually incorporate a little more flour—about a tablespoon at a time. But be careful! You want to avoid adding too much flour, as this can result in a denser loaf. The dough should still feel soft and slightly tacky, but not overly sticky.
Tip 2: Chill the Dough
Another trick is to chill the dough in the fridge. After mixing, if the dough feels too sticky to handle, wrap it in plastic wrap and refrigerate for 30 minutes to an hour. Chilling helps the butter firm up, making the dough easier to work with. This method also allows the dough to rest, which can improve its texture and flavor.
Tip 3: Use the “Wet Hands” Technique
If your dough is sticky but you don’t want to add too much flour, try using the wet hands technique. Simply dip your hands in water before handling the dough. This will prevent it from sticking to your fingers while you knead, making the process smoother. Just be careful not to get your dough too wet—use this method sparingly.
Tip 4: Knead Until Smooth
Sometimes, sticky dough is a sign that it hasn’t been kneaded enough. As you knead, the dough will become more elastic and less sticky. Be patient, and knead for the full amount of time suggested in the recipe—usually about 8-10 minutes. If you’re using a stand mixer, this is even easier, but the dough should still be soft and elastic once it’s fully kneaded.
Tip 5: Use Room Temperature Butter
Another culprit in sticky dough can be cold butter. If your butter is too cold when you add it to the dough, it can make the mixture difficult to incorporate. Room temperature butter is much easier to mix and will help prevent the dough from becoming overly sticky. Just make sure it’s soft, but not melted!
Tip 6: Consider Your Flour Type
The type of flour you’re using can also influence the dough’s stickiness. Bread flour with a higher protein content creates a stronger gluten structure, which can help prevent a sticky dough. If you’re using all-purpose flour, you may need to adjust the amount slightly to achieve the right consistency.
In summary, a sticky brioche dough isn’t the end of the world! With a little extra flour, a chill in the fridge, and some gentle kneading, you’ll be able to get your dough into the perfect shape. Just remember to take it slow and adjust as needed—before you know it, you’ll have a light, fluffy, and beautifully braided loaf ready to enjoy. Happy baking!
What if My Dough Isn’t Rising? Yeast Troubleshooting Tips
It can be frustrating when your brioche dough isn’t rising the way you expect. After all, that light, fluffy texture is the hallmark of a great brioche. Don’t worry, though—there are a few common reasons why dough can fail to rise, and plenty of simple fixes to get things back on track. Let’s dive into some helpful yeast troubleshooting tips.
1. Check the Freshness of Your Yeast
The first thing to consider is whether your yeast is still active. Yeast is the key ingredient that helps your dough rise, so if it’s past its prime, your dough won’t rise properly. To check, dissolve the active dry yeast in warm water (about 100°F/38°C) with a pinch of sugar. If it bubbles and foams after 5-10 minutes, it’s alive and well. If it doesn’t, it’s time to replace it with fresh yeast.
2. Make Sure the Water Isn’t Too Hot or Too Cold
When you mix your yeast with water, make sure the water temperature is just right. If it’s too hot, it can kill the yeast; too cold, and the yeast won’t activate properly. The ideal temperature for dissolving yeast is around 100°F (38°C)—just warm to the touch, not scalding. A thermometer can help ensure you get the perfect temperature, but if you don’t have one, aim for a comfortable warmth—like a warm bath.
3. Give the Dough Time to Proof
If you’re rushing the process, your dough might not have enough time to rise. Brioche dough can take a little longer to rise because of the richness of the ingredients, like butter and eggs. Be patient and let it rise in a warm, draft-free spot. You can cover the dough with a damp towel or plastic wrap to prevent it from drying out. If your kitchen is cold, try placing the dough in an oven with the light on or near a warm stovetop. It can take anywhere from 1-2 hours, so don’t be discouraged if it takes a little longer than other bread recipes.
4. Ensure a Properly Sized Bowl for Rising
When proofing your dough, make sure you’re using a large enough bowl. Dough needs room to expand as it rises, so use a bowl that’s at least double the size of your dough ball. If the dough is crowded in a small bowl, it can restrict its rise, leaving you with a denser loaf. A large bowl helps the dough spread out evenly and rise properly.
5. Check the Temperature of Your Kitchen
Yeast loves a warm environment, so if your kitchen is too cold, your dough won’t rise as it should. The ideal temperature for yeast to thrive is between 75°F-80°F (24°C-27°C). If your kitchen is on the chilly side, try placing the dough in a warm spot, like near the oven or on top of the refrigerator. Alternatively, you can use the oven with the light on or cover the dough with a damp cloth and place it in a warm, insulated area to help it rise.
6. Knead the Dough Properly
If your dough isn’t rising, it could be a sign that the gluten hasn’t developed properly during kneading. Knead the dough until it’s smooth and elastic. It should be soft but not too sticky. If you’re using a stand mixer, make sure the dough comes together and doesn’t stay too wet or overly dry. This ensures that your dough can trap the air bubbles needed for a good rise.
7. Consider the Humidity Levels
Humidity plays a role in how your dough rises. In dry environments, you may need to add a bit more water to compensate for evaporation. If the dough is too dry, it can’t expand as easily. In this case, just add a little water, one tablespoon at a time, until you get the right consistency for kneading.
8. Overproofing Can Be a Problem Too
It’s possible to let your dough rise too long. Overproofed dough will have lost its ability to rise further and may result in a denser loaf. To avoid overproofing, keep an eye on your dough and start checking it after the recommended proofing time. You can also perform the “poke test”—gently press your finger into the dough. If the indentation remains, it’s ready to move on. If the dough springs back too quickly, it needs more time to rise.
In Summary
If your brioche dough isn’t rising, don’t panic! With a few small adjustments—whether it’s checking your yeast, adjusting the water temperature, or giving the dough more time to proof—you can solve the problem. Keep in mind that brioche dough takes time, patience, and a bit of TLC, but once you get it right, the results are worth the wait! Happy baking!
How to Avoid Overbaking: Achieving the Perfect Soft Texture
When baking brioche, getting the texture just right can be a challenge. You want that golden, flaky exterior with a soft, pillowy interior—but it’s all too easy to overbake and end up with a dry, tough loaf. Luckily, with a few simple tips, you can ensure that your braided chocolate chip brioche comes out perfectly every time.
1. Keep an Eye on the Baking Time
The first key to avoiding overbaking is being mindful of the baking time. While most recipes will give you an estimated time, it’s essential to watch the bread closely toward the end. Every oven is different, and some may cook faster or slower than expected. Start checking your brioche about 5-10 minutes before the recommended baking time is up.
2. Use a Thermometer for Accuracy
For the most accurate results, use a kitchen thermometer to check the internal temperature of the bread. The perfect temperature for brioche is around 190°F-200°F (88°C-93°C). This ensures that the dough has fully cooked through without drying out. By using a thermometer, you can avoid guessing and confidently remove your brioche from the oven when it’s done.
3. Cover with Foil if Necessary
If your brioche is browning too quickly but isn’t yet fully cooked, cover it loosely with aluminum foil. This trick helps prevent the crust from becoming too dark while giving the dough more time to bake through. You can remove the foil during the last 10 minutes of baking to allow the bread to develop a golden finish.
4. Watch for a Beautiful Golden Brown Color
The exterior of your brioche should have a deep, golden-brown color. As it bakes, the sugars in the dough caramelize, giving it that beautiful hue. If you notice the crust starting to darken too much before the middle is fully cooked, it’s a sign you need to take action—either lower the oven temperature or cover the bread with foil, as mentioned earlier.
5. Don’t Let It Sit in the Oven After Baking
It can be tempting to leave your brioche in the oven after it’s done to stay warm, but that can lead to overbaking. Once it reaches the perfect internal temperature, remove it immediately and place it on a cooling rack. Letting it sit in the oven can continue to cook the bread, causing it to dry out.
6. Use a Light Touch When Testing for Doneness
Rather than cutting into the bread to check its doneness, try the tap test. Lightly tap the top of the loaf—it should sound hollow when it’s fully baked. If it still sounds dense or solid, give it a little more time in the oven. This method helps preserve the integrity of the soft brioche texture.
7. Pay Attention to Your Oven’s Temperature
Make sure your oven is fully preheated before you bake your brioche. An oven that’s too cold can cause the bread to take longer to cook, increasing the risk of overbaking. A hotter oven, on the other hand, may brown the exterior too quickly while leaving the inside undercooked. Always check your oven’s temperature with an oven thermometer to ensure it’s at the correct setting.
8. Cool the Brioche Properly
After baking, let the brioche cool on a wire rack. This helps to maintain its soft texture and prevents moisture from building up underneath the bread. Allowing the brioche to cool slightly before slicing ensures the best taste and texture, while also helping it hold its shape.
In Summary
Achieving the perfect brioche comes down to a few simple tricks: monitor the baking time closely, use a thermometer to check doneness, and don’t forget to cover the bread with foil if it’s browning too fast. With these tips in mind, your braided chocolate chip brioche will come out soft, light, and absolutely delicious. Happy baking, and enjoy the sweet, melt-in-your-mouth results!

Conclusion: Your Perfect Braided Chocolate Chip Brioche Awaits!
Making braided chocolate chip brioche might sound like a big task, but trust me, it’s easier than you think—and so worth it! Just follow the key steps: mix the dough, knead it until smooth, let it rest and rise, then incorporate those rich, melty chocolate chips. Once braided, bake it to golden perfection, and voilà! You’ve got a delicious, buttery loaf that’s perfect for breakfast, dessert, or a special treat.
I hope these tips and tricks have helped guide you through the process. Brioche may take a little patience, but the results will wow your taste buds and impress anyone you share it with. I’d love to hear how your braided chocolate chip brioche turns out—so feel free to leave a comment below and let me know your thoughts, or share your photos with me on social media!
If you enjoyed this recipe and want more baking inspiration, don’t forget to follow along for all the latest tips, tricks, and mouthwatering recipes. Happy baking, and I can’t wait to see your delicious creations!
For more dessert Recipes