
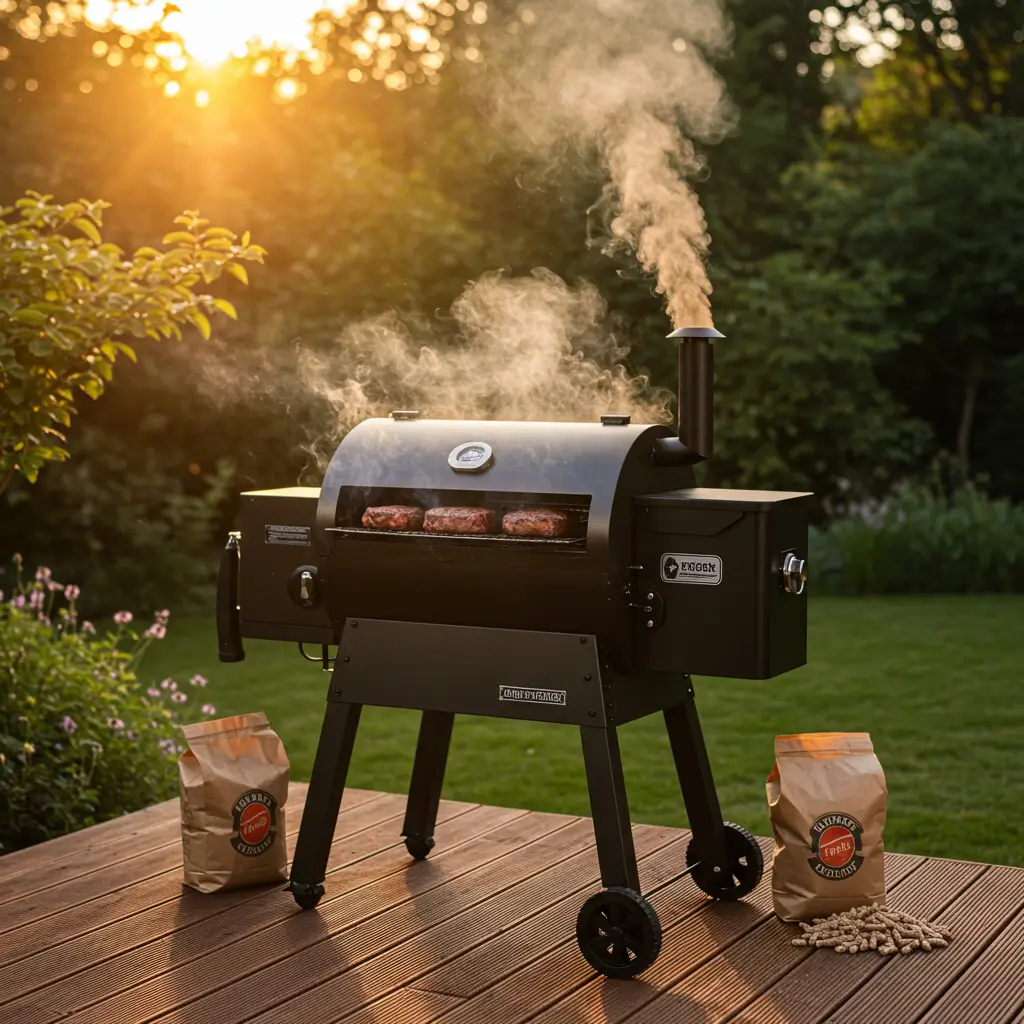
Pellet grilling has taken the barbecue world by storm, offering a perfect balance of convenience and rich, smoky flavor. Whether you’re a backyard BBQ enthusiast or a seasoned pitmaster, a pellet grill provides precise temperature control and consistent heat, making it easier than ever to achieve mouthwatering results.
Unlike traditional charcoal or gas grills, pellet grills use hardwood pellets to generate clean smoke, infusing meats, vegetables, and even desserts with deep, authentic flavors. From low and slow smoked brisket to perfectly seared steaks, the versatility of a pellet grill makes it a must-have for grilling lovers.
In this guide, we’ll cover the best pellet grill recipes, essential grilling techniques, and pro tips to help you master the art of pellet grilling. Whether you’re looking to smoke tender ribs, grill juicy chicken, or troubleshoot common issues, this blog will give you everything you need to take your grilling skills to the next level. 🔥🍖
Let’s fire up the grill and get started! 🚀
Getting Started with Your Pellet Grill
How Pellet Grills Work – Basics of pellet smokers and indirect heat cooking.
Pellet grills are designed to combine the best aspects of charcoal smokers, gas grills, and ovens, offering precise temperature control and a hands-off cooking experience. Unlike traditional grills, which rely on direct heat from flames, pellet grills use an indirect heat cooking method, allowing food to cook evenly while absorbing a rich, smoky flavor.
The Science Behind Pellet Grills
Pellet grills operate using an automated auger system that feeds compressed hardwood pellets into a firepot. These pellets are ignited by a hot rod, producing heat and clean smoke that circulates throughout the grill chamber. The digital control panel regulates the temperature by adjusting the pellet feed rate, ensuring consistent heat without constant monitoring.
Since indirect heat is used rather than direct flames, food is cooked more gently, reducing the risk of flare-ups or uneven cooking. This makes pellet grills perfect for low-and-slow smoking, roasting, and even baking.
Why Indirect Heat Matters
Indirect heat cooking works by circulating hot air around the food, much like a convection oven. This method allows for:
- Even Cooking – Heat surrounds the food, ensuring that every bite is perfectly cooked.
- Juicier Meats – Because food isn’t exposed to direct flames, moisture is retained, preventing over-drying.
- Enhanced Smoke Absorption – Longer cook times at lower temperatures allow the smoky flavor to penetrate deeply.
Pellet grills can maintain steady temperatures ranging from 180°F to 500°F, making them ideal for smoking, grilling, roasting, and even baking. Unlike charcoal or gas grills, which require manual temperature adjustments, pellet grills handle this automatically, making them a favorite among both beginners and experienced pitmasters.
Key Components of a Pellet Grill
- Pellet Hopper – Holds and feeds the wood pellets into the auger.
- Auger System – Transfers pellets from the hopper to the firepot.
- Firepot & Igniter – Burns the pellets, creating heat and smoke.
- Fan System – Distributes heat and smoke evenly throughout the grill chamber.
- Drip Tray – Catches grease and prevents flare-ups.
- Temperature Control Panel – Adjusts the temperature and pellet feed rate for precise cooking.
By understanding how pellet grills work, you can make the most of their efficiency, convenience, and incredible flavor potential. Whether you’re cooking low and slow or searing at high heat, mastering indirect heat cooking will elevate your grilling game to the next level! 🔥🍖
Choosing the Right Wood Pellets – Best hardwood pellets for different flavors (oak, hickory, mesquite, cherry).
The type of wood pellets you use in your pellet grill plays a crucial role in determining the overall flavor of your food. Unlike gas or charcoal grills, where flavor primarily comes from marinades and seasonings, pellet grills infuse natural wood smoke into the food, enhancing its taste in unique ways. Different hardwood pellets produce varying levels of smokiness, sweetness, and intensity, making it essential to choose the right pellets for the dish you’re preparing.
Understanding Hardwood Pellets
Wood pellets used in pellet grills are made from compressed sawdust and natural hardwood, with no artificial additives or fillers. The density and moisture content of the pellets ensure a consistent burn rate and steady smoke production. Premium-quality pellets burn cleaner and longer, providing better temperature control and a more refined smoky flavor.
Pellet flavors range from mild and sweet to bold and robust. By choosing the right wood type, you can complement the natural flavors of meats, vegetables, and even desserts.
Best Hardwood Pellets for Different Flavors
– Oak Pellets – Versatile & Balanced
- Oak pellets offer a medium smoke intensity, making them a great all-purpose choice.
- These pellets burn steadily and are often blended with other wood types for a well-rounded flavor.
- Best for: Beef, poultry, and baked goods.
– Hickory Pellets – Rich & Bold
- Hickory provides a strong, smoky flavor with slightly sweet undertones.
- This wood type is commonly used in Southern BBQ for its deep, hearty taste.
- Best for: Ribs, pork shoulder, bacon, and brisket.
– Mesquite Pellets – Intense & Earthy
- Mesquite pellets produce the strongest smoke flavor, often used in Texas-style BBQ.
- They burn hotter and faster than other hardwoods, making them ideal for grilling and searing.
- Best for: Steaks, burgers, wild game, and dark meats.
– Cherry Pellets – Sweet & Fruity
- Cherry wood pellets add a mild, sweet, and slightly tangy smoke flavor.
- They enhance the color of meats, giving them a rich mahogany finish.
- Best for: Chicken, turkey and seafood.
Mixing Wood Pellets for Custom Flavors
For a more complex smoke profile, different hardwood pellets can be blended together. For example:
- Hickory + Cherry – A balance of bold smokiness with a touch of sweetness.
- Oak + Mesquite – Strong flavor with a steady, even burn.
- Apple + Maple – Light, fruity, and perfect for poultry or baked dishes.
Choosing Quality Pellets
When selecting wood pellets, look for options that are 100% natural hardwood, with no fillers, binders, or artificial flavoring. High-quality pellets will burn cleaner, produce less ash, and deliver a more consistent cooking experience. Lower-quality pellets may contain moisture or additives, leading to uneven temperatures and excessive ash buildup.
By selecting the right hardwood pellets, you can elevate the taste of your grilled dishes and create signature flavors that set your BBQ apart. Experimenting with different wood types will help you find the perfect match for your favorite recipes! 🔥🍖
Essential Tools for Pellet Grilling – Thermometer, grill cover, cleaning brush, etc.
To achieve the best results with a pellet grill, having the right tools is just as important as selecting high-quality ingredients. While pellet grills offer precision cooking and a rich smoky flavor, proper maintenance, temperature control, and protection are necessary to keep them performing at their best. Investing in essential grilling tools not only enhances cooking efficiency but also extends the lifespan of your grill. Without these tools, maintaining consistent heat, preventing flare-ups, and ensuring food safety can become challenging.
1. Digital Meat Thermometer – Ensuring Precision Cooking
One of the most vital tools for pellet grilling is a digital meat thermometer. Since pellet grills cook food using indirect heat, you must monitor internal meat temperatures to avoid overcooking or undercooking. Even though many grills come with built-in probes, these aren’t always accurate, so you should use a separate thermometer.
With a wireless or instant-read thermometer, you can quickly obtain temperature readings, reducing the risk of constantly opening the lid and losing heat. Additionally, by maintaining the correct internal temperature, you can minimize food safety concerns, as harmful bacteria are effectively eliminated during the cooking process. Whether you’re grilling steaks, smoking brisket, or cooking poultry, a thermometer ensures that every dish turns out tender, juicy, and flavorful.
2. Grill Cover – Protecting Your Grill from the Elements
Pellet grills are a significant investment, and to keep them functioning properly, protection from the elements is essential. Exposure to rain, dust, and direct sunlight can lead to rusting, electronic malfunctions, and fading of the grill’s exterior. To prevent these issues, a durable, weather-resistant grill cover should always be used when the grill is not in use.
Made from heavy-duty materials like polyester or vinyl, high-quality grill covers shield against moisture and UV rays. Additionally, a snug-fitting cover prevents debris from accumulating inside the grill, which could otherwise clog the auger or vents. Without proper protection, a pellet grill’s lifespan may be significantly reduced, leading to costly repairs or replacements.
3. Cleaning Brush – Keeping Your Grill in Top Shape
To maintain optimal performance, you must clean your pellet grill regularly, and a grill brush is the perfect tool for the job. Over time, grease, food residue, and ash accumulate on the grates and interior surfaces, potentially affecting the flavor of the food. If you don’t remove built-up grease, it can increase the risk of flare-ups, leading to uneven cooking and safety hazards.
Several types of grill cleaning brushes are available, including bristle-free models, stainless steel options, and scraper tools. Experts recommend using bristle-free brushes because metal bristles can sometimes break off and contaminate food. To ensure effective cleaning, you should brush the grates after each grilling session while they are still warm. Additionally, perform deep cleaning periodically to remove hardened grease from the drip tray and fire pot. By keeping your grill clean, you ensure better heat distribution and enhance the flavor of your food.
4. Pellet Storage Container – Preserving Pellet Quality
Since wood pellets are highly susceptible to moisture, you must store them properly to maintain their burning efficiency. If pellets absorb humidity, they can swell, break apart, and cause blockages in the auger system, leading to temperature fluctuations and incomplete combustion. To avoid these issues, always use an airtight pellet storage container.
These containers, designed to keep pellets dry and fresh, are usually made of sealed plastic or metal with locking lids. You should keep them in a cool, dry place to prevent moisture damage. By storing pellets properly, you ensure consistent smoke production and clean burns, which enhances your overall grilling experience.
5. Drip Tray Liners – Simplifying Cleanup
Cleaning up after a long grilling session can be tedious, but drip tray liners make the process easier and faster. These liners catch excess grease and food drippings, preventing them from accumulating inside the grill. Over time, grease buildup can create sticky residue and cause flare-ups, which may affect cooking temperatures.
Available in disposable aluminum or reusable heavy-duty materials, drip tray liners protect the grill’s internal components and extend its lifespan. If you don’t use a liner, cleaning the drip tray becomes a time-consuming task, often requiring excessive scrubbing. By replacing the liners regularly, you can significantly reduce maintenance time.
6. High-Quality Grilling Utensils – Mastering Food Handling
A well-equipped griller needs a sturdy set of utensils, including heat-resistant tongs, a durable spatula, and a reliable basting brush. Since pellet grills rely on indirect heat, frequent flipping and repositioning of food are necessary to ensure even cooking. Using long-handled tongs prevents burns and allows for safer handling of large cuts of meat.
Additionally, a basting brush is essential for applying sauces and marinades without disturbing the food’s surface. A silicone basting brush is preferable because it is heat-resistant and easy to clean. With the right tools, grilling becomes more efficient, and better control over the cooking process is achieved.
Final Thoughts
Pellet grilling offers a unique and flavorful cooking experience, but having the right tools makes all the difference. From thermometers that ensure precise cooking to grill covers that protect your investment, each tool plays a crucial role in making grilling safer, easier, and more enjoyable. Regular maintenance, proper food handling, and careful storage of pellets contribute to the long-term performance of a pellet grill.
By investing in essential grilling accessories, every outdoor cook can enhance their skills, improve food quality, and keep their pellet grill in top condition for years to come. So, before firing up the grill, make sure these must-have tools are ready to elevate your BBQ game! 🔥🍖
Best Pellet Grill Recipes for Beginners
Classic Smoked Brisket – Step-by-step guide with seasoning tips.
Smoking a brisket to perfection is a true test of a pitmaster’s skill. This cut of meat, known for its toughness, requires low and slow cooking to break down connective tissues and develop rich, smoky flavors. While smoking a brisket may seem intimidating, following a step-by-step process ensures that the end result is tender, juicy, and packed with flavor.
Step 1: Choosing the Right Brisket
Selecting a high-quality brisket is the first step toward achieving great results. A whole packer brisket, which includes both the flat and the point, is recommended for smoking. The flat is leaner, while the point contains more marbling, contributing to a richer taste. When choosing a brisket, look for one with good marbling and a flexible texture—this indicates a juicy, flavorful final product.
Step 2: Trimming for Optimal Cooking
Before seasoning, you need to properly trim the brisket. While some fat is necessary to keep the meat moist, excessive fat can prevent proper smoke absorption. Use a sharp knife to trim the fat cap down to about ¼ inch, allowing just enough fat to render during cooking. Additionally, remove any tough silverskin on the underside, as it does not break down during the smoking process. If you don’t trim the brisket correctly, it may cook unevenly, leading to inconsistent texture.
Step 3: Seasoning – Keeping It Simple Yet Flavorful
When it comes to brisket seasoning, less is often more. A traditional Texas-style rub consists of just salt and black pepper in equal parts. The simplicity of this blend allows the rich beefy flavor to shine while still enhancing the bark formation. However, for those who prefer a bit more complexity, adding garlic powder, onion powder, and paprika can create a deeper flavor profile.
For best results, the seasoning should be applied evenly to all sides of the brisket, ensuring full coverage. It is important to let the rub sit for at least 30 to 60 minutes before placing the meat on the smoker. During this time, the salt starts drawing out moisture, which helps create a natural brine, leading to better seasoning penetration. Many pitmasters prefer seasoning the brisket overnight, as this allows even more flavor to develop.
Step 4: Smoking the Brisket – Low and Slow Method
Preheat the pellet grill to 225°F (107°C) before placing the brisket inside. Hardwood pellets like oak, hickory, or mesquite are ideal because they provide a robust smoky flavor that pairs well with beef. Once the smoker reaches the desired temperature, position the brisket with the fat cap facing up, allowing the fat to render and naturally baste the meat.
During the cooking process, you must carefully monitor the internal temperature. A digital meat thermometer is highly recommended to avoid unnecessary lid openings. Smoke the brisket until it reaches 165°F (74°C), at which point it enters the stall—a phase where the temperature plateaus as moisture evaporates from the meat.
To speed up this phase and retain moisture, use the Texas crutch method. Wrap the brisket in butcher paper or aluminum foil once it hits 165°F. Many prefer butcher paper because it allows the brisket to breathe while still retaining moisture, resulting in a better bark texture.
Step 5: Resting for Maximum Juiciness
Once the brisket reaches 203°F (95°C) in the thickest part, remove it from the smoker. However, slicing into it immediately would be a mistake. Instead, let the brisket rest for at least one to two hours, preferably in a cooler or wrapped in towels. During this time, the juices redistribute throughout the meat, ensuring a moist and tender bite. If you rush the process, the brisket may turn out dry as the juices will escape too quickly.
Step 6: Slicing and Serving
Once the brisket has rested, it’s time to slice and serve. To achieve the best texture, slice the brisket against the grain. The flat and point sections have different grain patterns, so pay careful attention when cutting each part. Thin slices (about ¼ inch thick) help retain tenderness and maximize flavor in every bite.
To complete the meal, serve classic BBQ sides such as coleslaw, baked beans, and cornbread alongside the smoked brisket. Whether served as a main dish or piled onto sandwiches, brisket always pleases the crowd when cooked correctly.
By following these steps and using the right seasoning techniques, anyone can master the art of smoking brisket on a pellet grill. While patience is required, the reward is a perfectly smoked brisket that is juicy, flavorful, and incredibly satisfying. 🔥🥩
Juicy Pellet Grill Chicken – How to maintain moisture and flavor.
Cooking chicken on a pellet grill can produce incredibly juicy and flavorful results, but achieving the perfect balance requires careful attention to temperature control, seasoning, and moisture retention techniques. Unlike beef, chicken is leaner, meaning it dries out more easily if not handled correctly. Fortunately, by following a few key steps, tender, succulent chicken can be consistently achieved.
Brining – The First Step to Moisture Retention
One of the best ways to ensure juicy chicken is brining. This process locks moisture into the meat, preventing it from drying out during cooking. A basic saltwater brine, made of water, salt, and optional sugar, helps break down muscle fibers, allowing the chicken to absorb extra moisture. For added flavor, you can include herbs, garlic, and spices in the solution.
To maximize effectiveness, submerge the chicken in the brine for at least 4 to 12 hours, depending on the size of the cut. Whole chickens benefit greatly from overnight brining, while smaller cuts like chicken breasts or thighs need less time. Once the brining is complete, pat the chicken dry before seasoning, ensuring the skin crisps up properly when cooked.
Seasoning for Maximum Flavor
Although brining enhances juiciness, seasoning is essential for developing flavor. A simple rub of salt, pepper, garlic powder, onion powder, and paprika creates a classic, well-balanced taste. However, for those who prefer bolder flavors, marinades or spice blends with citrus, soy sauce, or honey can add depth. Regardless of the seasoning choice, apply it evenly to ensure every bite is flavorful.
To enhance the smoky profile, place herbs like rosemary or thyme under the skin or inside the cavity of a whole chicken. This technique allows the flavors to infuse the meat while it cooks, resulting in a richer taste. When using marinades, let the chicken rest for at least an hour to give the flavors ample time to penetrate.
Temperature Control – The Key to Juiciness
A pellet grill provides consistent heat, making it an excellent choice for cooking chicken. However, maintaining the correct temperature is crucial to prevent dryness. Set the grill temperature between 325°F and 350°F for chicken, as this range ensures even cooking while allowing the skin to crisp up. Cooking at a lower temperature for too long can make the skin rubbery, while excessively high heat may burn the outside before the inside is fully cooked.
To avoid these issues, an internal meat thermometer should be used. Chicken is safe to eat when it reaches an internal temperature of 165°F in the thickest part of the meat. However, for dark meat like thighs and drumsticks, a slightly higher temperature (around 175°F) results in even better tenderness. Since carryover cooking continues after removal from the grill, letting the meat rest for about 5 to 10 minutes before slicing helps retain juices.
Using a Water Pan for Extra Moisture
Another great technique to maintain moisture is placing a water pan inside the pellet grill. As the water evaporates, the humidity level inside the grill increases, preventing the chicken from drying out. This method is especially useful for smoking whole chickens or bone-in cuts that require longer cook times. Additionally, flavored liquids such as apple juice, beer, or broth can be used in the water pan to add subtle hints of flavor to the meat.

Crisping the Skin Without Drying the Meat
While moisture retention is important, achieving a crispy, golden-brown skin is equally desirable. To do this, the skin should be as dry as possible before cooking. After brining or marinating, the chicken can be left uncovered in the refrigerator for an hour, which helps remove excess moisture from the surface.
During cooking, a light coating of oil or melted butter can be brushed onto the skin to enhance crispiness. Additionally, pellet choice plays a role in flavor—fruitwood pellets like apple or cherry create a mild, sweet smokiness, while hickory or pecan add a deeper, more robust taste.
Final Thoughts
Mastering juicy pellet grill chicken requires a combination of brining, seasoning, proper temperature control, and moisture-enhancing techniques. By following these steps, home cooks can produce restaurant-quality chicken that is tender, flavorful, and perfectly smoky. Whether preparing a whole smoked chicken, wings, or boneless breasts, these techniques ensure that every bite remains juicy and delicious. With the right approach, dry and flavorless chicken will become a thing of the past. 🔥🍗
Perfectly Smoked Ribs – Low and slow cooking method for tender ribs.
Smoking ribs to perfection requires patience, precision, and the low and slow cooking method. Unlike grilling over high heat, this technique allows the connective tissues to break down gradually, resulting in fall-off-the-bone tenderness. While the process may take several hours, the reward is a plate of ribs that are juicy, flavorful, and infused with rich, smoky aromas. By following the right steps—choosing the best ribs, seasoning properly, and maintaining an even temperature—anyone can achieve mouthwatering results.
Selecting the Best Ribs for Smoking
Before the smoking process begins, choosing the right cut of ribs is essential. There are three main types to consider: baby back ribs, spare ribs, and St. Louis-style ribs. Baby back ribs are leaner and cook faster, making them ideal for those who prefer a tender, meaty bite. Spare ribs, on the other hand, have more fat and connective tissue, which makes them exceptionally flavorful when smoked properly. St. Louis-style ribs, a trimmed version of spare ribs, provide a perfect balance between meatiness and tenderness.
Regardless of the type chosen, the membrane on the back of the ribs should be removed before seasoning. If left intact, it can become chewy and prevent the rub from fully penetrating the meat. While some butchers remove it beforehand, it is often left on and must be peeled away manually.
Seasoning the Ribs for Maximum Flavor
A great rack of ribs starts with a well-balanced rub. While some prefer complex spice blends, a simple mix of salt, black pepper, garlic powder, onion powder, paprika, and brown sugar works exceptionally well. The brown sugar helps create a delicious caramelized crust, while the other seasonings add depth.
To ensure even coverage, the seasoning should be applied generously on all sides of the ribs. Allowing the rub to rest for at least 30 to 60 minutes before smoking helps the flavors absorb into the meat. Some pitmasters choose to let the ribs sit overnight in the refrigerator, further enhancing the seasoning penetration.
The Low and Slow Smoking Process
Smoking ribs at 225°F (107°C) is the key to achieving tender, flavorful meat. This low temperature allows the collagen in the ribs to break down slowly, resulting in a juicy and succulent texture. Pellet grills are ideal for this process, as they provide consistent heat and allow for a steady infusion of smoky flavor.
To enhance the taste, hardwood pellets such as hickory, apple, cherry, or mesquite can be used. Hickory gives a bold, smoky flavor, while apple and cherry provide a milder, slightly sweet aroma. A combination of different woods can also be used to create a unique smoke profile.
Once the ribs are placed on the grill, the lid should remain closed as much as possible to maintain a steady temperature. Frequent opening causes heat fluctuations, which can affect the cooking time and texture of the ribs.
The 3-2-1 Method for Ultimate Tenderness
One of the most effective ways to smoke ribs is by using the 3-2-1 method, which ensures a perfect balance of tenderness, smokiness, and caramelization.
- The First 3 Hours – Smoke Infusion
The ribs should be placed bone-side down on the grill and smoked uncovered for the first three hours. During this stage, the ribs will absorb the smoky flavors and begin developing a flavorful bark. Spritzing with apple juice, apple cider vinegar, or a light broth every 45 minutes helps keep the meat moist. - The Next 2 Hours – Wrapping for Tenderness
After three hours of smoking, wrap the ribs tightly in aluminum foil or butcher paper. Before sealing the wrap, add a liquid such as apple juice, honey, butter, or even beer to enhance moisture and flavor. This step allows the ribs to steam inside the wrap, further breaking down tough connective tissues. - The Final 1 Hour – Glazing and Finishing
Once the ribs reach the six-hour mark, unwrap them and place them back on the grill. This final stage crisps up the surface, and you can apply a glaze or barbecue sauce. For those who prefer a saucier finish, brush on a few layers of sauce in the last 30 minutes, allowing the ribs to develop a sticky, caramelized coating.
Resting and Slicing for the Best Bite
Even though the ribs may look ready to eat, resting them for at least 10 to 15 minutes before slicing is essential. During this time, the juices redistribute throughout the meat, ensuring that every bite remains moist. If cut too soon, the juices will escape, leaving the ribs drier than desired.
When slicing, a sharp knife should be used to cut between the bones, ensuring even portions. Serving the ribs with classic BBQ sides such as coleslaw, cornbread, baked beans, or grilled vegetables makes for a complete and satisfying meal.
Final Thoughts
Perfectly smoked ribs require time, patience, and the right technique, but the results are well worth the effort. By using the low and slow method, applying a flavorful rub, and following the 3-2-1 technique, fall-off-the-bone tenderness can be easily achieved. Whether cooking for a backyard gathering or simply enjoying a personal BBQ feast, mastering the art of smoked ribs will impress friends and family alike. So fire up the pellet grill, grab some hardwood pellets, and get ready to enjoy some of the best ribs you’ve ever tasted! 🔥🍖
Grilled Vegetables & Sides – Easy pellet grill recipes beyond meat.
While pellet grills are often associated with juicy steaks, tender ribs, and smoky briskets, they are also perfect for cooking flavorful vegetables and delicious sides. The gentle, even heat produced by pellet grills enhances the natural sweetness of vegetables, while the smoky aroma adds an extra layer of depth. From charred bell peppers to cheesy baked potatoes, there are countless ways to use a pellet grill for side dishes that complement any barbecue feast.
Best Vegetables for Pellet Grilling
Almost any vegetable can be grilled, but some varieties stand out for their ability to retain moisture and absorb smoky flavors. Common favorites include zucchini, bell peppers, mushrooms, asparagus, eggplant, corn, and Brussels sprouts. Sturdier vegetables, like potatoes and carrots, need a longer cooking time, while softer options, such as tomatoes or spinach, require brief grilling to prevent overcooking.
Before grilling, lightly coat the vegetables in olive oil to prevent sticking and enhance caramelization. Additionally, a sprinkle of salt, pepper, and garlic powder boosts their natural flavors. For an extra smoky taste, wood pellets like cherry or pecan work exceptionally well with vegetables, adding a mild sweetness that complements their earthy tones.
Easy Pellet Grill Vegetable Recipes
Vegetables can be prepared in various ways, from simple grilled skewers to rich, smoky casseroles. Below are a few easy recipes that work beautifully on a pellet grill:
- Grilled Zucchini & Bell Peppers –Slice zucchini and bell peppers into thick strips, toss them in olive oil, balsamic vinegar, and Italian seasoning, and then grill at 375°F (190°C) for 10–12 minutes, turning once. The result is a charred, slightly sweet side dish that pairs perfectly with any protein.
- Smoky Grilled Corn on the Cob – Place whole ears of corn directly on the grill grates and cook at 400°F (204°C) for 15–20 minutes, turning occasionally. For added flavor, brush on a garlic butter glaze or sprinkle smoked paprika just before serving.
- Garlic Parmesan Brussels Sprouts – Toss halved Brussels sprouts with olive oil, minced garlic, and Parmesan cheese, then spread them in a cast-iron skillet. Cook at 375°F for about 20 minutes, and the sprouts will develop a crispy, caramelized texture with a nutty, smoky taste.
- Stuffed Portobello Mushrooms – Fill large portobello mushroom caps with cream cheese, spinach, and shredded mozzarella, then grill at 350°F (177°C) for 15 minutes until bubbly and golden brown. These hearty mushrooms can even serve as a vegetarian main dish.
Hearty Sides to Cook on a Pellet Grill
Beyond vegetables, you can also use a pellet grill to prepare hearty, comforting sides that take on an irresistible smoky quality. Many classic side dishes benefit from slow cooking and wood smoke, making them perfect for pellet grilling.
Smoked Baked Potatoes – Coat large russet potatoes in oil and salt, then place them directly on the grill at 275°F (135°C) for about 2 hours. The slow heat results in fluffy insides and crispy, golden skins. For an extra indulgent twist, top them with cheddar cheese, bacon bits, and sour cream.
Cheesy Smoked Mac & Cheese – Combine a rich cheese sauce made with cheddar, Gouda, and heavy cream with cooked elbow macaroni, then place the mixture in a foil pan. Smoke it at 225°F (107°C) for an hour, and the dish develops a subtle smokiness that enhances the creamy texture.
BBQ Baked Beans – Slow-cook a mix of navy beans, brown sugar, barbecue sauce, and diced bacon in a cast-iron skillet on the pellet grill at 300°F (149°C) for about an hour, allowing the flavors to meld together beautifully.
Smoked Jalapeño Poppers – Stuff fresh jalapeños with cream cheese and shredded cheddar, wrap them in bacon, and grill at 275°F (135°C) for 45 minutes. The combination of creamy, spicy, and smoky flavors makes these a perfect side or appetizer.
Final Thoughts
Cooking vegetables and sides on a pellet grill is an excellent way to create a well-rounded, flavorful meal without relying solely on meat. The low and slow method enhances natural flavors, while the wood smoke adds a delicious depth. Whether preparing grilled zucchini, stuffed mushrooms, or creamy mac & cheese, these dishes can elevate any BBQ spread. By experimenting with different seasonings, cooking times, and wood pellets, an endless variety of irresistible sides can be created with ease. So, next time you fire up your pellet grill, don’t forget to throw on some veggies and sides for a complete, mouthwatering feast! 🔥🥦🍠
Pro Tips to Enhance Your Pellet Grill Cooking
Temperature Control & Smoke Management – Keeping consistent heat for best results.
Mastering temperature control and smoke management is crucial for achieving the best results on a pellet grill. Unlike traditional charcoal or gas grills, pellet grills rely on automated temperature regulation, making them more convenient. However, maintaining consistent heat and proper smoke levels still requires careful attention. Without proper control, fluctuations in temperature can lead to overcooked, dry meat or undercooked, tough textures. By understanding how to manage heat and smoke effectively, perfectly smoked meats and vegetables can be achieved every time.
Understanding How Pellet Grills Maintain Temperature
Pellet grills are designed to regulate heat automatically using a built-in auger system, fan, and digital controller. The pellets are fed into the firepot at a controlled rate, where they are ignited to produce heat and smoke. The fan distributes heat evenly throughout the grill chamber, ensuring a steady cooking environment. However, external factors such as weather conditions, pellet quality, and grill maintenance can still impact temperature consistency.
For instance, cold or windy weather may cause heat loss, requiring the grill to work harder to maintain the set temperature. To counter this, placing the grill in a sheltered area or using an insulated blanket can help retain heat. Additionally, high-quality hardwood pellets burn more efficiently, reducing temperature swings. Lower-quality pellets, on the other hand, may contain excess filler materials, leading to inconsistent combustion and uneven cooking results.

Tips for Keeping a Steady Temperature
Even though pellet grills are designed to be user-friendly, small adjustments can improve temperature stability:
- Preheating the Grill Properly – Before placing food on the grates, the grill should be allowed to preheat for at least 10–15 minutes. This ensures that the cooking chamber reaches the desired temperature and minimizes initial fluctuations.
- Avoiding Frequent Lid Openings – Every time the grill lid is opened, heat escapes, causing the temperature to drop. The grill must then work harder to regain the set temperature, which can lead to inconsistent cooking. Instead, a wireless meat thermometer should be used to monitor doneness without lifting the lid too often.
- Using a Water Pan for Thermal Stability – A small pan of water placed inside the grill helps to regulate heat and maintain moisture levels. As the water evaporates, it stabilizes temperature fluctuations, ensuring more even cooking.
- Keeping the Firepot and Grill Clean – Ash buildup inside the firepot can cause airflow blockages, leading to erratic temperature changes. Regularly cleaning the grill and emptying excess ash will help keep the fire burning smoothly and efficiently.
Smoke Management for the Best Flavor
In addition to temperature control, managing smoke levels is essential for producing great-tasting food. Pellet grills generate a clean-burning smoke, but if airflow is restricted, thick, stale smoke can accumulate, resulting in a bitter taste. To avoid this, several techniques can be used:
- Choosing the Right Pellets – Different wood pellets produce varying levels of smoke intensity. For a mild, slightly sweet smoke, fruitwoods like apple or cherry are ideal. For a stronger, bolder flavor, hickory or mesquite pellets work well. Mixing different types of pellets can create a balanced smoke profile.
- Adjusting the Smoke Output – Lower cooking temperatures (around 180–225°F) create more smoke, while higher temperatures produce less smoke but a stronger sear. For foods like brisket or ribs, maintaining a lower temperature for longer ensures maximum smoke absorption.
- Ensuring Proper Ventilation – Pellet grills rely on proper airflow to maintain a clean-burning fire. Keep the chimney or exhaust vent partially open to allow excess smoke to escape while ensuring continuous air circulation.
- Using a Smoke Tube for Extra Flavor – To achieve a stronger smoky taste, place a smoke tube filled with additional wood pellets inside the grill. This accessory allows the grill to produce extra smoke without affecting temperature stability.
Final Thoughts
Controlling temperature and smoke on a pellet grill is a key skill that separates average grilling from exceptional barbecue. By keeping the heat steady, using high-quality pellets, and managing smoke output, you can cook meats, vegetables, and even baked goods to perfection. While pellet grills are designed for convenience, paying attention to small details—such as managing the lid, properly preheating, and performing regular maintenance—makes a significant difference. Once you master these techniques, achieving delicious, smoky flavors with perfectly cooked textures becomes effortless. So, whether you’re smoking a rack of ribs or grilling vegetables, maintaining proper temperature and smoke levels will ensure outstanding results every time. 🔥🍖
Using BBQ Rubs & Marinades – Flavor enhancement techniques.
Achieving the perfect balance of flavor, tenderness, and juiciness in barbecue requires the right seasoning techniques. Two of the most effective ways to enhance taste are through BBQ rubs and marinades. While both methods infuse meat with bold flavors, they work differently to achieve their results. BBQ rubs create a flavorful crust, adding texture and depth, whereas marinades penetrate the meat, keeping it moist and tender. By understanding how to use both techniques properly, home grillers can elevate their pellet grill recipes to restaurant-quality perfection.
BBQ Rubs – Creating a Flavorful Crust
BBQ rubs are a combination of spices, herbs, and seasonings that are applied directly to the surface of meat. They form a flavor-packed bark as the food cooks, especially in low and slow smoking. Rubs can be either dry or wet, depending on the desired texture and moisture level.
- Dry Rubs – Made from a blend of salt, sugar, black pepper, paprika, garlic powder, and other spices, dry rubs adhere to the meat, drawing out moisture and forming a caramelized crust during cooking. A balanced mix of sweet, salty, and smoky elements enhances the overall taste.
- Wet Rubs – A dry rub can be turned into a paste by adding mustard, oil, or vinegar, helping the seasoning stick better while adding a slight tangy flavor.
For the best results, apply dry rubs generously and massage them into the meat. Let the rub sit for at least 30 minutes before cooking, but for deeper flavor penetration, season the meat and refrigerate it overnight.
Marinades – Infusing Moisture & Tenderness
Unlike rubs, marinades are liquid-based and work by soaking meat for several hours to break down tough fibers. This process makes the food juicier and more flavorful. A good marinade contains three essential components:
- Acidic Ingredients – Lemon juice, vinegar, or yogurt help tenderize proteins by breaking down muscle fibers.
- Oils – Olive oil or sesame oil locks in moisture and prevents meat from drying out.
- Seasonings & Aromatics – Garlic, herbs, soy sauce, and spices provide bold flavors that seep into the meat over time.
For optimal flavor, marinating time depends on the protein:
- Chicken: 2 to 4 hours
- Pork: 4 to 6 hours
- Beef: 6 to 12 hours
- Fish: 30 minutes to 1 hour
However, if left too long, highly acidic marinades may break down the meat excessively, leading to a mushy texture.
When to Use Rubs vs. Marinades
Choosing between a rub and a marinade depends on the type of meat, cooking method, and desired flavor profile. If a crispy, spice-infused exterior is preferred, a dry rub is the best option. On the other hand, when cooking leaner meats like chicken breast or pork loin, a marinade helps retain moisture. Additionally, combining both methods—marinating first and applying a rub before cooking—can create layers of complex flavors.
Final Thoughts
Whether you use a bold spice rub or a tangy marinade, these seasoning techniques can transform any grilled dish. By selecting the right method and allowing enough time for flavors to develop, you ensure that every bite is packed with rich, smoky goodness. For the best results, experiment with different herbs, spices, and flavor combinations. Ultimately, mastering BBQ rubs and marinades will make every pellet-grilled meal a showstopper! 🔥🍖
Reverse Searing for Perfect Steaks – Step-by-step guide for a crispy crust and juicy center.
Achieving a perfectly cooked steak with a crispy crust and a juicy, tender center can be challenging. However, the reverse searing method has become a go-to technique for many grill enthusiasts because it provides greater control over the cooking process. Unlike traditional searing, where you cook the steak over high heat first, reverse searing involves slowly cooking the steak at a lower temperature before finishing it with a hot sear. This method ensures an evenly cooked interior while still delivering the beautifully caramelized crust that steak lovers crave.
Why Reverse Searing Works So Well
The key benefit of reverse searing is temperature control. By starting with low and slow cooking, the steak gradually reaches the desired doneness without overcooking the outer layers. As a result, the dreaded “gray band” of overcooked meat—often seen in steaks cooked with traditional methods—reduces significantly. Additionally, the slow heating process allows the steak’s natural juices to redistribute evenly, keeping the meat moist and flavorful.
Moreover, the final high-heat sear triggers the Maillard reaction, a process in which the natural sugars and proteins in the steak form a deeply flavorful, crispy crust. When you cook it properly, the pellet grill’s wood-fired heat also enhances a rich, smoky aroma.
Step-by-Step Guide to Reverse Searing on a Pellet Grill
To master the reverse sear, follow these simple steps:
- Choose the Right Cut – Thick-cut steaks (at least 1.5 to 2 inches thick) work best for reverse searing. Ribeye, strip steak, filet mignon, and tomahawk steaks make excellent choices.
- Season the Steak – Before cooking, generously season the steak with salt, black pepper, and optional herbs or garlic powder. For deeper flavor, dry brine the steak by leaving it uncovered in the refrigerator for at least an hour or overnight.
- Preheat the Pellet Grill – Set the grill to 225°F (107°C) and use wood pellets that complement the beef, such as oak, hickory, or mesquite. These woods add a subtle smokiness to the meat during the slow-cooking phase.
- Slow Cook the Steak – Place the steak directly on the grill grates and cook until it reaches an internal temperature of:115–120°F (46–49°C) for rare125°F (52°C) for medium-rare135°F (57°C) for medium
This process usually takes 45 minutes to an hour, depending on the thickness of the steak. Use a wireless meat thermometer to monitor the internal temperature without opening the lid too often. - Rest the Steak – Once the target temperature is reached, remove the steak from the grill and let it rest for 5–10 minutes. This allows the juices to redistribute throughout the meat, ensuring a more tender bite.
- Sear Over High Heat – Increase the pellet grill’s temperature to 500°F (260°C) or use a cast-iron skillet over direct heat. Sear the steak for 45–60 seconds per side, flipping once, until a deep golden-brown crust forms.
- Final Rest & Serve – Let the steak rest for another 5 minutes before slicing. This final step helps preserve the juices, preventing them from escaping when the steak is cut.
Pro Tips for the Best Reverse-Seared Steak
- Use a Meat Thermometer – Precision is key when reverse searing. A high-quality thermometer ensures you cook the steak to the exact desired doneness.
- Don’t Skip the Resting Periods – Resting between cooking and searing locks in moisture, preventing dryness.
- Experiment with Butter & Herbs – For extra richness, add a pat of butter, along with garlic and rosemary, during the final sear.
Final Thoughts
Reverse searing is one of the best techniques for cooking thick, juicy steaks on a pellet grill. By using low heat first and finishing with a blistering hot sear, this method guarantees an evenly cooked steak with a flavorful crust. While it requires patience, the results are well worth the effort. Once perfected, this technique will quickly become a go-to method for grilling steak to perfection every time. 🔥🥩
Troubleshooting Common Pellet Grill Issues
Why Is My Pellet Grill Not Smoking Enough? – Fixing low smoke output.
One of the main reasons people choose pellet grills is for the rich, smoky flavor they impart to food. However, at times, a pellet grill may not produce enough smoke, leading to a less flavorful final result.This can be frustrating, but fortunately, several factors influence smoke production, and you can easily correct most issues. By understanding how smoke is generated and making the right adjustments, you can enhance your cooking experience and achieve that deep, smoky taste you crave.
Understanding How Pellet Grills Produce Smoke
Pellet grills operate using an automated system where wood pellets are fed into a firepot, ignited, and then burned at a controlled rate. A fan circulates the heat and smoke throughout the grill, ensuring even cooking. However, smoke production varies based on temperature settings, airflow, pellet quality, and grill maintenance.
Typically, lower temperatures (between 180°F and 225°F) produce more smoke, while higher temperatures create a cleaner burn with less visible smoke. If a grill is not producing enough smoke, the issue is likely related to one of these factors.
Common Reasons for Low Smoke Output & How to Fix Them
- Temperature is Too High
Pellet grills generate the most smoke at lower temperatures. If the grill is set above 250°F, the pellets burn more efficiently, reducing visible smoke. - Poor Pellet Quality
The type and quality of pellets used greatly affect smoke output. Pellets made with too many fillers or artificial binders burn too cleanly, reducing smoke. - Improper Airflow
If airflow is restricted inside the grill, the fire will burn too hot, leading to reduced smoke production. Additionally, excess ash buildup can block ventilation. - Fast-Burning Pellets
Some pellets burn hotter and faster, leaving less time for smoke to develop. This is especially true for low-quality or old pellets that have absorbed moisture. - Grill is in High Fan Mode
Many pellet grills have a fan that regulates airflow. When the fan runs too fast, pellets burn more efficiently, but less smoke is produced. - Using a Smoke Tube for Extra Flavor
If the pellet grill is still not producing enough smoke, a smoke tube can be added. This is a metal cylinder that holds additional wood pellets and smolders slowly, providing extra smoke without affecting temperature.
Final Thoughts
Although pellet grills are designed for efficient burning, smoke levels can vary based on several factors. By adjusting temperature settings, improving pellet quality, and ensuring proper airflow, you can enhance smoke production and achieve that signature wood-fired flavor. If needed, additional tools like a smoke tube can boost smokiness without modifying the grill’s settings. With a few simple tweaks, you can infuse every dish with the deep, smoky essence that makes pellet-grilled food so delicious. 🔥🍖
Pellet Grill Temperature Fluctuations – Causes and solutions.
Pellet grills are known for maintaining consistent temperatures, making them a popular choice for both beginners and experienced grillers. However, fluctuations in temperature can sometimes occur, affecting the cooking process and final results. These variations stem from multiple factors, including external weather conditions, pellet quality, airflow restrictions, and mechanical issues. Fortunately, you can minimize most temperature fluctuations with a few adjustments. By understanding the root causes and applying the right solutions, you can ensure a steady and reliable cooking experience.
Common Causes of Pellet Grill Temperature Fluctuations & How to Fix Them
- Weather Conditions Affecting Heat Retention
Outdoor temperature, wind, and humidity can significantly impact a pellet grill’s performance. Cold weather forces the grill to work harder to maintain heat, while strong winds can disrupt airflow, causing uneven burns. - Low-Quality or Moisture-Exposed Pellets
Pellet quality plays a crucial role in maintaining a steady temperature. If pellets are damp or contain too much filler material, they burn inconsistently, leading to temperature swings. - Dirty Firepot & Ash Buildup
Over time, ash buildup in the firepot restricts airflow, causing the fire to struggle and resulting in inconsistent heating. If you don’t clean the firepot regularly, temperature fluctuations will occur more frequently. - Blocked or Improper Airflow
Proper airflow is essential for steady combustion. If intake or exhaust vents are blocked, the grill may experience erratic temperature changes. Similarly, excessive fan speed can cause a rapid burn, leading to overheating. - Grill Lid Opening Too Often
Every time you open the grill lid, a significant amount of heat escapes, forcing the system to work harder to recover the lost temperature. This causes fluctuations and extends cooking times. - Controller Malfunctions or Software Issues
Some modern pellet grills rely on digital controllers to regulate temperature. If the controller is faulty or outdated, temperature swings may occur due to improper pellet feeding rates.
Final Thoughts
Temperature fluctuations in a pellet grill can be frustrating, but you can effectively manage these issues with proper maintenance, high-quality pellets, and smart grilling techniques. By addressing airflow concerns, keeping the grill clean, and protecting it from harsh weather conditions, you can achieve precise and consistent cooking temperatures. With these solutions in place, every cookout will be a success, producing perfectly grilled food every time. 🔥🍖
Preventing Dry Meat on a Pellet Grill – Keeping meat juicy with proper techniques.
One of the biggest challenges when cooking on a pellet grill is ensuring that the meat remains tender and juicy. While pellet grills offer excellent temperature control, improper techniques can still lead to overcooked, dry meat. However, by using the right methods—such as brining, basting, using a water pan, and monitoring internal temperatures—you can greatly improve moisture retention. With a few simple adjustments, you can make even the toughest cuts of meat turn out succulent and flavorful every time.
Key Techniques to Keep Meat Moist
- Brining for Extra Moisture Retention
Brining is one of the most effective ways to prevent dryness, especially for lean meats like chicken, turkey, and pork chops. During the brining process, salt helps the muscle fibers absorb and retain moisture, making the meat juicier even after long cook times. - Using a Water Pan for Humidity Control
Dry heat can quickly sap moisture from meat, especially during long smoking sessions. A water pan placed inside the grill creates steam, helping to maintain a humid cooking environment. - Basting and Spritzing for Added Moisture
As meat cooks, it gradually releases moisture, which can lead to dry textures. To counteract this, baste or spritz the meat with a liquid to lock in moisture and enhance flavor. - Cooking at the Right Temperature
Overcooking is one of the main causes of dry meat. Each type of meat has an ideal internal temperature, beyond which the texture starts to suffer. - Letting Meat Rest Before Slicing
Even when cooked correctly, slicing meat immediately after grilling can cause juices to spill out, leading to drier results.
Final Thoughts
Preventing dry meat on a pellet grill is achievable with a few simple adjustments. Brining, basting, using a water pan, and cooking at the right temperature all help retain moisture more effectively. Additionally, resting the meat before slicing ensures that every bite stays juicy and delicious. With these techniques, you can avoid dry, tough meat and make every grilling session a success. 🔥🍖

Final Thoughts & Expert Recommendations
Pellet grilling is a fantastic way to cook with rich flavors, and mastering it comes with a few best practices. First, maintaining consistent temperatures ensures even cooking and a smoky finish. Choosing the right wood pellets like hickory or cherry adds depth to your dishes. Techniques like brining and basting help keep meat juicy, while monitoring internal temperatures prevents overcooking. Additionally, cleaning your grill regularly and ensuring good airflow is key for long-term performance.
Experimenting with different wood pellets can offer unique flavor profiles, and trying out various seasonings and marinades adds excitement to your grilling. Whether it’s a spicy rub for ribs or a citrusy marinade for chicken, the options are endless.
Now, it’s time to get creative! Share your favorite pellet grill recipes and tips in the comments below. Let’s keep the grilling inspiration flowing and enjoy more smoky, flavorful meals together! 🔥🍗