
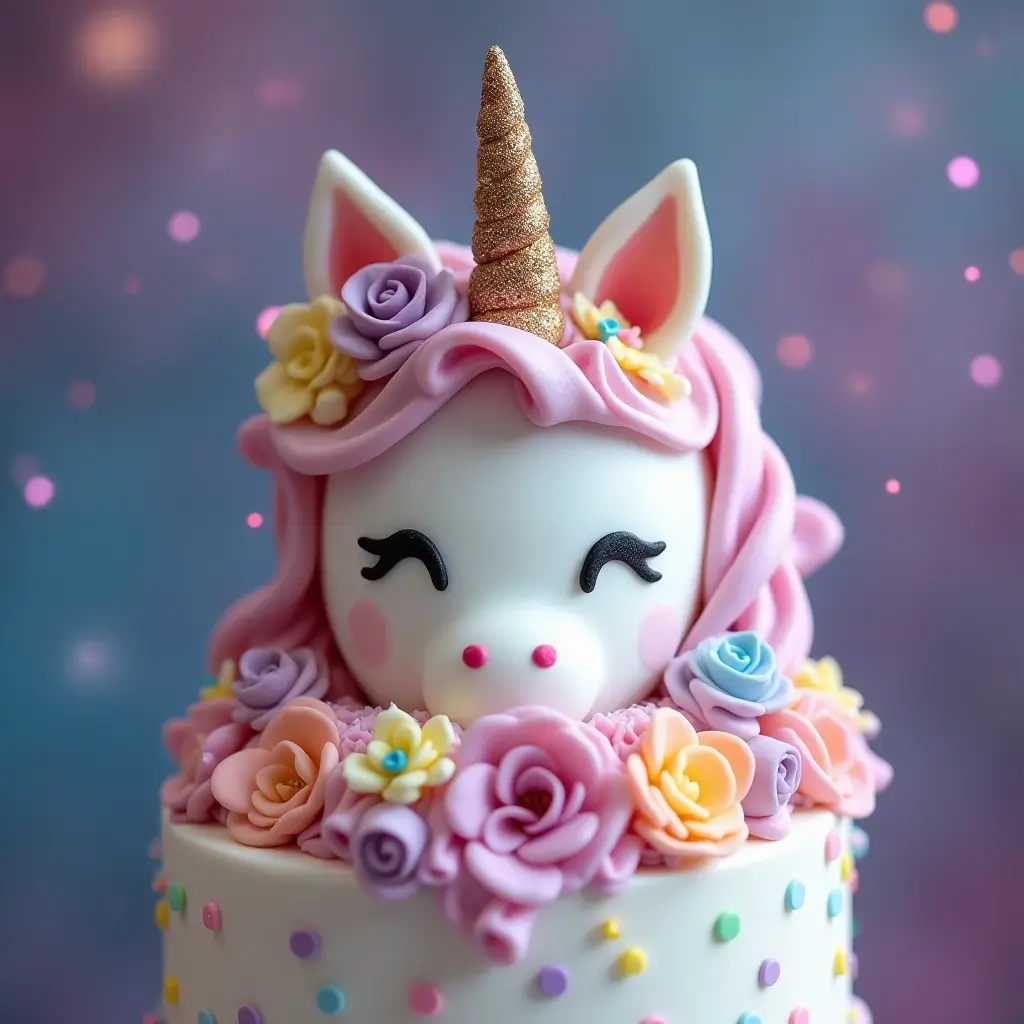
Unicorn cakes are more than just desserts—they’re magical creations that bring joy and excitement to any celebration. Whether it’s a child’s birthday, a baby shower, or a whimsical themed party, these cakes steal the show with their vibrant rainbow layers, shimmering edible glitter, and enchanting fondant details. They’re not just cakes; they’re a perfect blend of creativity and sweetness, guaranteed to make any occasion unforgettable.
Creating a unicorn cake might seem a little intimidating at first, though. From the delicate horn to the pastel buttercream swirls and smooth frosting, it can feel like you need a little bit of magic to make it come together. But don’t worry—I’ve got you covered! In this guide, I’ll walk you through every step, from baking those fluffy, colorful layers to decorating with the jaw-dropping final touches. No matter your experience level, I’ll show you how to create a unicorn cake that’s both beautiful and delicious.
Ready to wow your friends and family with a cake that’s as enchanting as it is tasty? Let’s dive in and uncover the secrets to making a unicorn cake that’s perfect every time!
The Essentials for a Perfect Unicorn Cake
Must-Have Ingredients
To create a stunning unicorn cake, having the right ingredients is key. These essentials will help bring your magical creation to life—whether you’re crafting vibrant rainbow layers or adorning your cake with an enchanting fondant horn. Here’s what you’ll need to get started:
1. Cake Base:
- Flour – For a light and airy texture, all-purpose flour works perfectly.
- Sugar – Granulated sugar gives the cake the right level of sweetness, but feel free to adjust based on your taste.
- Baking Powder – This helps the cake rise, ensuring it’s fluffy and soft.
- Butter – Choose unsalted butter for the best control over the cake’s flavor.
- Eggs – These bind everything together while adding moisture. Make sure they’re at room temperature.
- Milk – Full-fat milk creates a rich, tender cake. If you want to make it dairy-free, almond or oat milk works well.
- Vanilla Extract – This simple ingredient adds depth to your cake’s flavor and complements the sweetness.
2. Rainbow Layers:
- Food Coloring – Gel food coloring gives you vibrant, bold colors without altering the cake’s texture. Pick colors like pink, purple, blue, green, and yellow for that classic unicorn look.
- Heavy Cream – This is essential for making smooth buttercream frosting that’s easy to pipe and spread. It also helps you achieve the perfect consistency for frosting the cake.
3. Buttercream Frosting:
- Butter – You’ll need plenty of unsalted butter for a rich, creamy frosting.
- Powdered Sugar – For sweetness and to achieve that perfect, fluffy consistency.
- Vanilla Extract – Adding a teaspoon of vanilla will elevate the flavor of your buttercream.
- Heavy Cream – Just like for the cake layers, a bit of cream will help create that dreamy texture in the frosting.
4. Fondant Decorations:
- Fondant – This is your go-to for creating the unicorn horn, ears, and any other decorative details. You can buy ready-to-roll fondant or make your own if you’re feeling adventurous!
- Edible Glitter – This magical touch will give your unicorn cake the sparkle it deserves. Apply it gently over the cake’s surface to make it truly shine.
- Gold Edible Paint – Use this to paint the unicorn horn or other elements for a sophisticated, whimsical look.
Pro Tips:
- Room Temperature Ingredients: Always ensure your butter, eggs, and milk are at room temperature. This helps the ingredients blend smoothly, preventing a lumpy batter.
- Mix Gently: When adding the food coloring, fold the batter gently to keep the texture light. Too much stirring can cause the cake to be dense.
- Balance the Colors: Don’t go overboard with the food coloring—just a few drops are enough for a bright, eye-catching cake.
By using these ingredients and tips, you’re setting yourself up for a unicorn cake that’s as tasty as it is visually stunning. Next, we’ll dive into the fun part: the step-by-step guide to baking and decorating this magical masterpiece!
Basic Cake Supplies
Before you dive into the magic of creating your unicorn cake, having the right supplies is crucial. These tools will make the process smoother, ensuring each step from baking to decorating is as enjoyable as the finished cake itself. Here’s a list of essential cake supplies you’ll need:

1. Pans for Perfect Layers
- Round Cake Pans (8 or 9 inches) – For that classic unicorn cake shape, two or three round pans work perfectly. Make sure they’re of equal size for even layers.
- Parchment Paper – Line your cake pans with parchment paper for easy release. No one wants a cake stuck to the pan!
- Cake Release Spray – If you prefer a hassle-free option, spray your pans with a cake release spray to prevent sticking.
2. Mixing and Measuring Tools
- Mixing Bowls – You’ll need at least two large mixing bowls—one for your dry ingredients and one for wet. This keeps everything organized and helps with easier mixing.
- Measuring Cups and Spoons – Accurate measurements are key to a perfect unicorn cake. Grab a set of measuring cups and spoons to ensure you’re getting the right proportions for each ingredient.
- Whisk and Electric Mixer – A hand whisk will work for smaller batches, but an electric mixer or stand mixer is your best friend for the job. It ensures smooth, lump-free batter and evenly mixed ingredients.
3. Cake Decorating Tools
- Piping Bags – These are essential for applying buttercream frosting with precision. Use different tips for ruffles, rosettes, or piping a beautiful border around your cake.
- Piping Tips – A variety of tips (such as star, round, and petal) will help you create intricate designs like swirls, flowers, and smooth edges.
- Cake Turntable – This rotating platform makes it so much easier to frost your cake evenly. You can turn the cake as you decorate, making the process less tiring and more precise.
- Offset Spatula – A long, flat spatula helps you spread frosting smoothly over the cake. It’s perfect for getting into the nooks and crannies of your layers without disturbing the structure.
4. Fondant Tools (For Decorations unicorn cake)
- Rolling Pin – To roll out fondant evenly, a smooth rolling pin is essential. Opt for one with measurements on the side to keep everything consistent.
- Fondant Cutters – These tools are used to create the unicorn horn, ears, and any other details. Simple shapes like circles and stars can be made with these cutters.
- Flower Molds – If you’re planning on adding little fondant flowers to your cake, these molds can help you create the perfect shape with ease.
Pro Tips for Using Cake Supplies:
- Prep Your Tools First: Before you start baking, gather and prep all your supplies. This will help the process go smoothly and avoid interruptions when you’re in the thick of decorating.
- Invest in Quality: While it’s tempting to go for inexpensive tools, investing in a good electric mixer or cake turntable can really make a difference, especially for beginners.
- Keep Everything Clean: When working with buttercream or fondant, make sure your tools and surfaces are clean to prevent colors from mixing unintentionally.
With these basic supplies, you’ll be ready to tackle every step of making your unicorn cake with confidence. So, gather your tools, and let’s get to baking the perfect layers before we dive into the magical decorating part!

Preparation Tips for unicorn cake
To make your unicorn cake as flawless as possible, a little preparation goes a long way. Taking the time to set everything up correctly will not only save you time later but also ensure the final product is beautiful and delicious. Here are some preparation tips to keep in mind as you start your baking journey:
1. Gather All Your Ingredients and Tools First
- Before you start mixing, take a few minutes to gather and measure all your ingredients. Having everything ready and within reach is a game-changer, especially when you’re working with vibrant food colors or intricate decorating details.
- Lay out all your cake supplies, including your pans, mixing bowls, and frosting tools. Trust me, this step will make the entire process feel much more organized.
2. Prep Your Cake Pans
- Line your cake pans with parchment paper to ensure the cake comes out easily without sticking. Simply cut out circles of parchment to fit the bottom of each pan, and lightly grease the sides with butter or oil.
- If you don’t have parchment paper, a quick dusting of flour over the greased pan can do the trick. But parchment paper is the secret for a smooth, hassle-free release!
3. Bring Your Ingredients to Room Temperature
- For the best results, make sure your butter, eggs, and milk are at room temperature. Cold ingredients can cause the batter to seize, resulting in a dense or uneven texture. Let these ingredients sit out for about 30 minutes before you start mixing.
- This will help the batter come together more smoothly and result in a fluffier cake.
4. Preheat the Oven
- This might sound obvious, but preheating the oven is essential! Preheat your oven to the temperature specified in the recipe before you begin. It ensures that your cake bakes evenly from the moment you put it in the oven.
- If you’re working with multiple cake layers, set your timer to check for doneness after 25-30 minutes. Every oven is different, so don’t hesitate to rotate your pans halfway through to ensure even baking.
5. Divide Your Cake Batter for Colorful Layers
- Once your batter is ready, divide it into separate bowls for each color you plan to use. Add food coloring a few drops at a time, mixing gently so the batter stays light and fluffy. Don’t over-mix, or you may lose that airiness.
- You can use gel food coloring for the most vibrant hues without compromising the cake’s texture. Start with basic colors like pink, purple, and blue for a traditional unicorn look—or go wild with a custom palette!
6. Be Mindful of Cake Cooling
- After baking, let your cake layers cool in the pans for about 10 minutes. Then, carefully transfer them to a wire rack to cool completely. This step prevents the cake from becoming soggy and gives the frosting a smooth surface to cling to.
- If you’re in a rush, you can pop the layers in the fridge for 15-20 minutes to speed up the cooling process.
Pro Tips:
- Room Temperature Ingredients: This cannot be stressed enough! Always allow your butter and eggs to come to room temperature for the best batter consistency.
- Coloring Tip: For the brightest, most vivid unicorn layers, use gel food coloring instead of liquid. It blends seamlessly and won’t alter the cake’s texture.
- Even Layers: If you want perfectly even layers, consider using a kitchen scale to divide the batter evenly between your pans. It’s an extra step that can really pay off visually.
With these prep tips in place, you’re all set for success! Whether you’re making vibrant rainbow layers or crafting intricate fondant details, these steps will ensure your unicorn cake is as magical as you imagined. Now that we’re ready, it’s time to bake those layers and get to the fun part—decorating!
Step-by-Step Guide to Baking the Unicorn Cake
Baking the Base Layers
Now that you’ve prepped your ingredients and gathered your tools, it’s time to bake those beautiful base layers for your unicorn cake. Baking the perfect cake layers is all about consistency and timing. Let’s walk through the process step by step to ensure each layer is as light, fluffy, and colorful as possible.
1. Prepare Your Cake Batter

- Once you’ve mixed your ingredients, divide your batter into separate bowls for each color. You can use a spoon or an ice cream scoop to ensure each color gets an even amount of batter. This way, each layer of your unicorn cake will be just the right thickness.
- Add a few drops of gel food coloring to each bowl, stirring gently. Remember, gel food coloring is your best friend for achieving bold, vibrant colors without affecting the cake’s texture. Mix until you reach your desired shade.
2. Pour and Smooth the Batter
- Now comes the fun part: pouring your colorful batter into the cake pans! Start by adding the first color to the center of each pan. Use the back of a spoon to gently spread it into an even layer. This technique creates a beautiful marbled effect when layered with the other colors.
- Continue layering the different colored batters on top of each other, one color at a time, without mixing. Don’t worry about perfect symmetry—this is part of the charm! The layers will spread and settle as the cake bakes.
3. Bake to Perfection
- Place your pans in the preheated oven and bake according to the time specified in the recipe (usually about 25-30 minutes). For best results, check the doneness by inserting a toothpick into the center of the cake. If it comes out clean, your cake is ready.
- If you’re baking multiple layers, rotate the pans halfway through baking to ensure even heat distribution. Every oven is different, so keep an eye on your cakes to prevent overbaking.
4. Let the Layers Cool
- Once the cakes are done, remove them from the oven and let them sit in the pans for about 10 minutes. This allows the cakes to firm up and makes them easier to remove from the pans.
- After the initial cooling time, transfer the cakes to a wire rack to cool completely. This step is crucial to ensure that your cake doesn’t become soggy or collapse when you add the frosting.
Pro Tips:
- Avoid Overmixing: When adding food coloring, mix gently to avoid deflating the batter. Overmixing can lead to dense layers, which we want to avoid for a light, fluffy cake.
- Test for Doneness Early: Oven temperatures can vary, so start checking your cakes around 20 minutes. If they’re golden brown and spring back when touched, they’re done!
- Even Layers: For consistent layers, use a kitchen scale to divide your batter evenly between pans. This will help you achieve perfectly even layers, making your cake look even more impressive.
Baking the base layers is a crucial step to ensure your unicorn cake has the right foundation. By following these tips, you’re on your way to creating beautiful, colorful layers that will make your cake as stunning as it is delicious. Now that your layers are baked and cooled, let’s move on to the exciting part—decorating!
Creating the Unicorn Horn
The unicorn horn is the star of the show, and crafting it to perfection will really make your cake stand out! Whether you’re using fondant or modeling chocolate, this fun decoration adds a touch of whimsy and magic to your unicorn cake. Let’s walk through the steps to create a unicorn horn that’s both stunning and easy to make!
1. Choose Your Material
- Fondant: Fondant is the most common choice for creating the unicorn horn. It’s pliable, smooth, and holds its shape well, which makes it perfect for sculpting.
- Modeling Chocolate: If you prefer a more edible option with a chocolate flavor, modeling chocolate is a great choice. It’s easy to work with and adds a delicious twist to your cake.
2. Roll and Shape the Horn
- Start by taking a small amount of fondant or modeling chocolate and rolling it into a smooth ball. You’ll need about 1/4 to 1/2 cup of fondant for a standard-sized horn.
- Gently roll the ball into a long, tapered shape by gradually applying more pressure toward the end. The base should be thicker, and the top should be pointed, resembling the shape of a unicorn horn.
- Use your fingers to smooth out any creases or uneven parts. You want the horn to look sleek and flawless.
3. Add the Spiral Twist
- To give your unicorn horn its signature spiral design, roll out a long, thin rope of fondant or modeling chocolate. Gently twist this rope around the horn, starting from the base and working your way to the tip.
- Be sure to press the edges of the rope into the horn as you go, securing it in place. This will give the illusion of a twisted, magical spiral.
- If the spiral rope isn’t sticking well, lightly dampen the surface of the horn with a small amount of water or edible glue.
4. Dry the Horn
- Allow the unicorn horn to dry and harden. If you’re using fondant, this should take a few hours to set, while modeling chocolate may take a little longer. Be patient! A solid horn will stand tall and proud on top of your cake.
- If you want to speed up the drying process, place the horn in a cool, dry area. Just make sure it’s not exposed to direct heat or humidity, which could cause it to soften.
5. Add the Finishing Touches
- Once the horn is completely dry, it’s time to add a little sparkle. You can lightly dust the horn with edible gold or silver luster dust for a magical, metallic finish.
- If you want a more vibrant look, brush the horn with edible paint or a mix of edible glitter and water to give it a shiny, shimmering effect.
Pro Tips:
- Patience is Key: Allow your horn to dry completely before placing it on the cake. A floppy horn will ruin the overall look!
- Use Cornstarch: If your fondant or modeling chocolate gets too sticky while working, dust your hands and surface lightly with cornstarch to prevent it from sticking.
- Support the Horn: If you’re concerned about the horn toppling over, use a small wooden dowel or cake pop stick inserted into the base to provide extra support and stability.
Creating the unicorn horn is a fun, creative part of decorating your cake. With these simple steps, you’ll have a beautiful, show-stopping decoration that will add that final magical touch to your unicorn cake. Ready to continue? Let’s move on to the next step—adding the magical unicorn ears!
Perfecting the Frosting
When it comes to creating the perfect unicorn cake, the frosting plays a vital role—it’s not only delicious but also enhances the cake’s visual appeal. Whether you prefer a silky buttercream or a smooth cream cheese frosting, getting the texture just right is key. Let’s dive into how you can perfect your frosting and achieve that beautiful, smooth finish that will make your unicorn cake truly shine!
1. Choose the Right Frosting
The first step is selecting a frosting that fits your flavor profile and decorating needs. Here are a few popular options for a unicorn cake:
- Buttercream Frosting: Rich, creamy, and versatile, buttercream is the go-to frosting for most cakes. It’s easy to work with, holds its shape well, and can be colored beautifully.
- Cream Cheese Frosting: If you prefer a tangy, slightly less sweet flavor, cream cheese frosting is an excellent choice. It pairs wonderfully with carrot, red velvet, or even vanilla cake.
- Swiss Meringue Buttercream: For a silky-smooth finish that’s less sweet than traditional buttercream, Swiss meringue buttercream is the way to go. It’s perfect for creating sharp, clean edges on your cake.
2. Achieve the Perfect Consistency
One of the most common frosting struggles is achieving the right consistency. Too thick, and it’s hard to spread. Too thin, and it runs off the cake. Here’s how to get it just right:
- For a Spreadable Consistency: If your frosting is too stiff, add a teaspoon of milk (or heavy cream) at a time until it reaches the desired texture. You want it thick enough to hold its shape but smooth enough to spread easily.
- For Piping Consistency: If you’re planning to pipe your frosting, make sure it’s firm enough to hold up to the pressure of the piping bag but soft enough to flow smoothly through the nozzle. The ideal consistency will allow your piping to hold its shape without drooping or running.
- For Smooth Frosting: If your frosting is too thin and runny, chill it in the refrigerator for 15-20 minutes to help it firm up. This will make it much easier to apply without it dripping down the sides of the cake.
3. Add Color for a Magical Look
Now comes the fun part—coloring your frosting! For a unicorn cake, you’ll want vibrant, pastel colors to match your rainbow theme. Here are some tips for achieving the perfect shade:
- Use Gel Food Coloring: Gel food coloring is your best bet for achieving rich, vibrant colors. It’s more concentrated than liquid food coloring, so you don’t need to use as much. Add a small amount and mix it in to see the color intensify.
- Make Multiple Colors: Divide your frosting into small bowls and add different colors to each. You can choose colors like pink, purple, blue, and yellow for a traditional unicorn theme. Remember, pastel colors work beautifully, but you can also get creative with your own mix.
- Avoid Overmixing: When coloring, be gentle with your mixing to keep the texture smooth. Over-mixing can cause your frosting to become too airy and lose its consistency.
4. Frosting the Cake
Once your frosting is ready and colored, it’s time to apply it to your cake. Here’s how to ensure a smooth and even application:
- Crumb Coat First: Before you start adding your final layer of frosting, apply a thin layer of frosting all over your cake to seal in any crumbs. This is called the crumb coat. Chill the cake for 15-20 minutes to set the crumb coat.
- Apply the Final Layer: After the crumb coat has set, apply a thicker, more generous layer of frosting to the top and sides of your cake. Use an offset spatula to spread the frosting evenly and smoothly.
- Smoothing the Frosting: To get a perfectly smooth surface, dip your offset spatula in warm water and gently smooth over the frosting. This helps eliminate any ridges or air bubbles.
Pro Tips:
- Frosting Temperature: If your frosting is too cold, it can be hard to work with. If it’s too warm, it may melt. Aim for a medium temperature, where the frosting is soft but still holds its shape.
- Chill Between Layers: If you’re layering frosting colors, it’s a good idea to chill the cake between layers to prevent the colors from bleeding into each other.
- Decorating Tip: If you’re not confident in achieving a smooth surface, consider using a bench scraper to smooth the sides of the cake for a polished look.
Perfecting your frosting is a crucial step in creating a magical unicorn cake that’s both visually appealing and delicious. By following these tips, you’ll achieve smooth, colorful layers of frosting that will make your cake stand out at any celebration. Ready for the finishing touches? Let’s move on to assembling your cake and adding those magical details!
Decorating Secrets for a Magical Touch
Adding Edible Glitter and Sparkles
No unicorn cake is complete without a touch of magic—enter edible glitter and sparkles! These shimmering accents not only elevate the aesthetic of your cake but also give it that enchanted, fairy-tale look. Let’s explore how you can add these fun, glitzy touches to make your unicorn cake truly stand out.
1. Choose the Right Edible Glitter
- Types of Edible Glitter: There are various types of edible glitter available, each offering a unique finish:
- Fine Glitter: Perfect for a subtle shimmer that coats the entire cake in a soft, sparkling effect.
- Chunky Glitter: For a bolder, more dramatic look. This type adds dimension and catches the light, making your cake sparkle.
- Luster Dust: Although it’s more like a powder than glitter, luster dust adds a beautiful sheen and is perfect for highlighting the unicorn horn or adding accents to the cake’s surface.
- Non-Toxic Ingredients: Make sure the glitter is specifically labeled as food-grade and non-toxic. Not all glitters are safe to eat, so always check the packaging before purchasing.
2. Apply Glitter to the Unicorn Horn
The unicorn horn is the focal point of your cake, so it deserves a touch of sparkle. Here’s how to make it shine:
- Dusting the Horn: Using a clean, dry brush, lightly dust edible glitter or luster dust over the unicorn horn. A gentle touch will give it that ethereal glow without overwhelming the design.
- Go for Gold or Silver: Gold or silver glitter adds a magical metallic finish that complements the pastel colors of your unicorn cake. If you want to go for a truly enchanted look, opt for both gold and silver for a two-toned effect.
3. Sparkle the Cake Surface
- Light Dusting: To give your cake a soft shimmer, lightly dust the top and sides with edible glitter. Use a fine mesh sieve or a small sifter to evenly distribute the glitter, ensuring it doesn’t clump together.
- Layering for Impact: For more impact, you can layer the glitter. Start with a light dusting, let it settle, and then add another layer for a more dazzling effect. Don’t overdo it—subtlety goes a long way in creating an elegant look.
4. Add Glitter to the Decorations
You can also apply edible glitter to other elements of your cake to tie everything together:
- Unicorn Ears: Give the unicorn’s ears a touch of glitter for extra sparkle. This will help them catch the light and make your cake feel extra magical.
- Flowers or Decorations: If you’re adding edible flowers, fondant decorations, or even piped buttercream accents, lightly dust them with glitter for a cohesive, shimmering effect across the entire cake.
5. Use Edible Pearls for Extra Glam
For an added touch of glamour, edible pearls can be strategically placed around the cake. These can be added along the base of the unicorn horn, on the cake’s borders, or even scattered across the frosting for a whimsical finish. Their smooth, round shape reflects the light beautifully and pairs well with edible glitter.
Pro Tips:
- Less is More: When it comes to edible glitter, a little goes a long way. Too much glitter can overpower the design, so aim for a subtle, enchanting sparkle that adds just the right amount of magic.
- Set the Glitter: If you’re worried about the glitter sliding off or smearing, use a light spritz of edible shimmer spray to set it in place. This ensures your glitter stays intact throughout the celebration.
- Timing Matters: Add your glitter as a final touch, right before serving or shortly before your event. This will prevent the glitter from melting into the frosting if left sitting too long.
Adding edible glitter and sparkles is the perfect finishing touch to your unicorn cake. With just a few simple steps, you can transform your cake into a glittering masterpiece that will leave everyone in awe. Now that your cake is ready to shine, let’s move on to the final step—presenting and serving your magical creation!
Piping Beautiful Buttercream Ruffles
Piping beautiful buttercream ruffles is one of the most elegant and show-stopping techniques for decorating a unicorn cake. These soft, flowing ruffles give the cake a delicate, yet striking texture, perfect for adding that final touch of sophistication. Whether you’re looking to create a full ruffled border or highlight areas with elegant rosettes, this technique is both easy and stunning. Let’s walk through the steps to perfect your buttercream ruffles.
1. Prepare the Buttercream
Before you start piping, make sure your buttercream is the right consistency for piping ruffles:
- Consistency Check: You want your buttercream to be thick enough to hold its shape but not too stiff to pipe. It should have a smooth, soft texture that holds up well when piped. If your buttercream is too thin, it might spread too much and not hold its shape.
- Color Your Buttercream: If you’re going for a colorful ruffled look, divide your buttercream into separate bowls and tint each batch with gel food coloring to match your unicorn cake theme. Pastel shades like pink, lavender, light blue, and mint green work wonderfully for a unicorn look.
2. Set Up Your Piping Bags
- Piping Tip: Use a closed star tip (like a 1M or 2D) for creating the ruffle effect. This particular tip has a textured surface that will give the ruffles their soft, flowing look.
- Fill the Bag: Once you’ve selected your piping tip, fill your piping bag with the buttercream of your choice. Be sure to fill the bag only halfway to ensure you have enough space to maneuver and create clean, controlled ruffles.
3. Start Piping the Ruffles
- Positioning the Piping Tip: Hold your piping bag at a 45-degree angle to the cake’s surface, with the pointed tip facing downwards and the open end angled towards the cake. Apply gentle pressure on the bag to release the buttercream.
- Piping the First Ruffle: Begin by piping a small rosette at the bottom of the cake, starting at the base. Then, gently pull the piping tip away while making a slight, curved movement to create the ruffled edge. The texture of the closed star tip will naturally create the ruffled look.
- Building Layers: After piping the first ruffle, move slightly up the cake, and repeat the process, layering the ruffles. As you go, slightly overlap each ruffle to create a fuller, layered effect. You can choose to pipe a full row of ruffles around the bottom, or just create clusters of ruffles on the cake’s surface for a more whimsical look.
4. Create a Continuous Flow
- Seamless Ruffles: To achieve a seamless, continuous ruffle look, ensure the piping is smooth and consistent throughout. Work in small sections to keep your ruffles uniform and avoid over-piping, which can create a messy look.
- Varying Sizes: For added interest, consider varying the sizes of the ruffles. Some larger ruffles at the bottom paired with smaller ones higher up can give your cake an elegant gradient effect.
5. Adding Final Touches
- Clean the Edges: Once you’ve piped all of your ruffles, take a small offset spatula and gently smooth the edges of any uneven areas. You can also go back with your piping bag to fill in any gaps.
- Sprinkle Some Magic: For that added unicorn sparkle, consider adding edible glitter or small decorative pearls between the ruffles. This extra touch will elevate the cake’s visual appeal and create a truly magical design.
Pro Tips:
- Practice First: If you’re new to piping ruffles, it can be helpful to practice on a piece of parchment paper before starting on your actual cake. This will give you a chance to get comfortable with the technique.
- Chill Your Buttercream: If your buttercream starts to melt while you’re piping, place your cake in the fridge for 10-15 minutes to firm up the frosting before continuing.
- Be Patient: Take your time with each ruffle to ensure they are evenly spaced and have the desired effect. Rushing through this part can result in uneven ruffles.
Piping beautiful buttercream ruffles may seem daunting at first, but with a little patience and practice, you’ll master this elegant technique. The ruffled buttercream effect adds a magical touch to any unicorn cake, enhancing its whimsical charm. So, take your time, enjoy the process, and watch your cake transform into a masterpiece! Ready to move on to the next step? Let’s finish off your magical creation with some gorgeous finishing touches!
Finishing with Unicorn Toppers
No unicorn cake is truly complete without the magical finishing touch of unicorn toppers! These delightful accents transform your cake into a whimsical showstopper, capturing the essence of a unicorn in every detail. Whether you’re using store-bought toppers or creating your own, this final step will elevate your cake to new heights of beauty and fun.
1. Choose the Right Unicorn Toppers
There are many options when it comes to unicorn toppers, each adding its own unique flair. Here’s how to choose the best ones for your cake:
- Edible Unicorn Toppers: If you want to keep the entire cake edible, consider using edible unicorn toppers made from fondant or edible wafer paper. These can be molded into various shapes, such as unicorn ears, horns, or even full unicorn faces. Edible toppers are the perfect way to add intricate details while keeping everything delicious.
- Non-Edible Unicorn Toppers: For a bit of extra fun, non-edible toppers like plastic unicorn figurines or gold-painted horns can be placed on top. These make great keepsakes after the party, and they add a cute, playful element to your design.
- Fondant or Sugar Unicorn Decorations: If you’re feeling creative, try making your own unicorn toppers using fondant or modeling chocolate. This allows you to customize the toppers to fit your specific theme, with the freedom to add colors and details that complement the rest of your cake.
2. Perfecting the Unicorn Horn
The unicorn horn is one of the most iconic elements of the cake, so making sure it stands out is key. Here’s how to make a standout unicorn horn:
- Edible Unicorn Horns: You can make a unicorn horn from fondant, modeling chocolate, or a candy cane for a sweet touch. Roll the material into a cone shape and twist it gently to form the iconic spiral. Once shaped, paint it with edible gold or silver paint to give it a shiny, magical finish.
- Non-Edible Horns: If you prefer a non-edible horn, you can use a plastic or wooden horn and cover it with gold glitter or metallic paint to add a shimmering effect. Secure the horn carefully on top of the cake using a bit of royal icing or melted chocolate.
3. Decorating with Unicorn Ears and Mane
The ears and mane are what truly bring your unicorn cake to life. Here’s how to make them shine:
- Unicorn Ears: If you’re using fondant, roll out small pieces to create delicate ear shapes. You can even add a little pink fondant for the inner ear detail to make them look more realistic. Position the ears gently at the top of the cake, on either side of the horn, for that classic unicorn look.
- Unicorn Mane: To create a colorful, flowing mane, pipe vibrant buttercream or fondant strands cascading from the top of the cake. Use multiple colors, such as pink, lavender, and mint green, to mimic a rainbow mane. You can also add small edible flowers or sparkles to the mane for an added magical touch.
4. Final Touches with Sparkles and Decorations
Now it’s time to add a bit of extra magic with sprinkles, edible glitter, or colorful pearls. These small details will help tie your unicorn cake together:
- Edible Glitter: Lightly dust edible glitter or luster dust on the unicorn horn, ears, and mane. This will give the whole cake a soft, magical shimmer that catches the light beautifully.
- Sprinkles & Pearls: Add colorful sprinkles or edible pearls around the cake to enhance the whimsical look. Scatter them on the base or around the unicorn features for a playful, festive feel.
- Sugar Flowers or Stars: Consider adding small sugar flowers or edible stars around the unicorn’s face or along the sides of the cake for that extra burst of color and magic.
5. Placement and Presentation
Finally, step back and take a look at the overall design. The placement of your unicorn toppers can make all the difference:
- Center the Unicorn Horn: Make sure the unicorn horn is positioned at the top center of the cake, as this is the focal point of the design. The ears should follow closely behind the horn, creating a balanced look.
- Use a Cake Stand: Place your finished unicorn cake on a beautiful cake stand to elevate its presentation. A stand with a slightly elevated base allows the unicorn toppers to shine and gives the whole cake an elegant, polished appearance.
Pro Tips:
- Don’t Overcrowd: While it’s tempting to add as many toppers as possible, it’s important to keep the design balanced. Let the unicorn horn, ears, and mane be the main focal points while adding smaller decorative accents around them.
- Secure Toppers Properly: If using non-edible toppers, ensure they are securely placed with royal icing or a dab of melted chocolate to prevent them from toppling over.
- Get Creative: The beauty of decorating a unicorn cake is that you can be as whimsical and creative as you like! Mix and match colors, add extra details, and make it truly your own.
Finishing your unicorn cake with these magical toppers will make it a true masterpiece. These playful, enchanting elements will not only captivate your guests but also create a stunning focal point for any celebration. With just a few finishing touches, your cake will be ready to shine like the magical unicorn it represents.
Common Mistakes and How to Avoid Them
Overmixing the Batter: Why It’s a No-No for Perfect Unicorn Cake
When it comes to making a flawless unicorn cake, the batter is the foundation of your creation. You’ve gathered all the ingredients, and you’re ready to mix them together—but be careful! Overmixing the batter is one of the most common mistakes that can affect the texture of your cake. Understanding why overmixing is problematic and how to avoid it will help you achieve a light, fluffy cake every time.
1. What Happens When You Overmix the Batter?
Overmixing the cake batter causes the flour to develop too much gluten. Gluten is a protein found in flour that, when activated by liquid and mixing, helps provide structure. While a little gluten is essential for your cake to hold its shape, too much can make your cake dense and tough—definitely not the soft, airy texture you’re looking for in a perfect unicorn cake.
- Dense Texture: The more you mix, the more gluten is activated, which can lead to a dense, heavy cake instead of a light and fluffy one.
- Dryness: Overmixing can also cause the cake to lose moisture, leading to a dry, crumbly texture.
- Toughness: The excessive gluten formation results in a tougher crumb that will feel chewy and less desirable.
2. How to Avoid Overmixing
The good news is that avoiding overmixing is easy once you understand the proper technique. Here’s how to get your batter just right:
- Mix Until Combined: When adding your dry ingredients to the wet ingredients, mix them only until you no longer see streaks of flour. A few lumps are totally fine! Just be sure not to continue mixing after the ingredients are incorporated.
- Use a Gentle Hand: Stir the batter gently and avoid using an electric mixer at high speed once you’ve added the flour. This will prevent overworking the batter and help maintain its lightness.
- Scrape the Sides and Bottom: To ensure even mixing, scrape the sides and bottom of the bowl as you go. This ensures that no flour or wet ingredients get left behind, so you don’t need to overmix to achieve a uniform consistency.
- Mix in Small Batches: If you’re working with a large batch of batter, divide it into smaller portions. This allows you to focus on mixing each portion gently and thoroughly without overdoing it.
3. The Key: Mindful Mixing
It’s all about balance. While under-mixing can lead to pockets of unincorporated flour or wet ingredients, overmixing leads to the opposite problem—tough, dense cake layers. The goal is a smooth batter with just the right amount of air to create a light and tender crumb.
- Use a Rubber Spatula: A rubber spatula is perfect for gentle folding and mixing. It helps you maintain control over how much you’re working the batter, ensuring that you don’t go too far.
- Keep an Eye on the Time: When mixing the dry and wet ingredients together, keep an eye on the clock. The goal is to spend as little time mixing as necessary. Just 15–20 seconds after the ingredients are combined should be enough to ensure everything is properly mixed.
4. Why This Matters for Your Unicorn Cake
Achieving the right texture is especially important for unicorn cakes. Since these cakes are often decorated with vibrant, intricate designs, you want the base to be perfect so that it can support all those colorful layers and delicate toppings. A well-mixed batter leads to soft, fluffy layers that provide a great base for your frosting, ruffles, and beautiful unicorn toppers.
Pro Tips:
- Trust Your Senses: If your batter looks smooth and well-combined, you’re done! Trust your visual and tactile senses to guide you.
- Consider a Folding Technique: When adding ingredients like whipped egg whites or sour cream, fold them in gently to prevent deflation and maintain the lightness of the cake.
In summary, mastering the art of mixing is key to creating the perfect unicorn cake. By avoiding overmixing, you’ll ensure that your cake turns out light, fluffy, and ready for all the magical decorations you’ll add. Keep your mixing gentle, your technique mindful, and you’ll have a cake that’s the true star of any celebration.
Uneven Cake Layers: How to Achieve a Perfectly Level Cake
Uneven cake layers are one of the most frustrating issues when making a unicorn cake. Not only can they affect the overall look of your cake, but they can also make the frosting and decorations more difficult to apply. The good news is, with a few simple techniques, you can easily ensure that each layer is even, creating a stunning, level base for your cake.
1. Why Uneven Layers Happen
Before we dive into how to fix uneven layers, it’s important to understand why they happen in the first place. Several factors can lead to a cake that isn’t perfectly level:
- Batter Distribution: If the batter isn’t spread evenly in the cake pan, some areas may bake higher than others, creating uneven layers.
- Oven Hot Spots: Many ovens have areas that are hotter than others. If the heat is uneven, the cake will rise unevenly, leading to lopsided layers.
- Batter Temperature: Starting with warm batter or pouring it into a hot pan can cause it to rise unevenly, resulting in a bumpy texture.
By knowing the cause, you can take steps to prevent it.
2. Tips for Leveling Your Cake Layers
Now that you know why it happens, let’s take a look at the best strategies to avoid uneven layers and ensure a perfectly smooth, even cake.
- Distribute the Batter Evenly: Before placing the batter in the pan, tap the bottom of the pan gently on the counter to help it settle. You can also use a spatula to spread the batter evenly across the surface, making sure it reaches the edges and corners of the pan.
- Use a Cake Leveler or Serrated Knife: Once your cake has cooled, it’s time to level it. A cake leveler is an inexpensive tool that helps you slice off the domed top of your cake to create a perfectly flat surface. If you don’t have a leveler, a serrated knife works just as well. Cut off any unevenness carefully, ensuring you keep the layers even throughout.
- Measure Your Cake Layers: If you’re making multiple layers, you may want to measure each layer to ensure they’re the same height. You can use a ruler or a cake marker to check the thickness of each layer, so everything is uniform.
- Cut Evenly with the Right Tools: If you’re working with multiple cake layers, use a serrated knife or a cake slicer to trim each layer evenly. Start cutting from the center and work your way out to ensure that each slice is consistent.
3. Bake with Precision
In order to set yourself up for success, it’s also helpful to start with proper baking techniques that help avoid unevenness from the beginning.
- Use the Right Pan Size: Using the correct pan size is essential for even layers. If your pans are too small, the batter may spill over, causing uneven layers. Make sure you’re using the pan size recommended in your recipe.
- Preheat the Oven: Always preheat your oven before baking to ensure consistent heat throughout the process. An oven thermometer can help you verify that the temperature is accurate, preventing hot spots from affecting your cake.
- Rotate the Cake Pans: If your oven has hot spots, rotating the pans halfway through the baking process can help ensure even heat distribution. Just make sure you do this carefully to avoid disturbing the batter.
4. Extra Tip: Even Cooling for Even Layers
Once your cake is baked, the cooling process is just as important to maintain even layers. Avoid placing the hot cake directly on a cooling rack that might cause it to lean or tip. Instead, let the cakes cool for a few minutes in the pans before transferring them to the rack. Allowing the cakes to cool completely ensures they settle evenly.
Pro Tips:
- Don’t Rush the Cooling Process: If you cut your cake too soon after baking, it may still shift, making it difficult to level. Let the cakes cool completely before leveling.
- Consider Using Cake Strips: These strips wrap around your pans and help bake the cake more evenly, preventing domed tops.
- Check for Air Bubbles: Gently stir the batter before pouring it into the pan to release any air bubbles, which can lead to uneven baking.
By following these simple tips, you can eliminate the frustration of uneven cake layers and create a beautifully smooth, level unicorn cake every time. These small adjustments make a world of difference, ensuring your cake will stand tall and beautiful, ready for the magical decorations to come!
Messy Frosting Application: Tips for a Neat, Professional Finish
Frosting a unicorn cake is one of the most exciting steps, but it can also be one of the messiest if not done right. Whether it’s uneven application, smudges, or just too much frosting, messy frosting can make your cake look less polished. Don’t worry, though! With a few handy techniques and tips, you can create a smooth, neat, and professional-looking finish that will make your unicorn cake shine.
1. The Importance of a Crumb Coat
One of the most effective ways to prevent messy frosting application is by starting with a crumb coat. This is a thin layer of frosting that you apply to your cake before you go in with the final, thicker layer of frosting. The crumb coat helps lock in crumbs and ensures your final frosting layer goes on smoothly, without little bits of cake getting mixed in.
- How to Apply a Crumb Coat:
- Start by applying a thin layer of frosting all over the cake, making sure to cover the top and sides.
- Use a bench scraper or offset spatula to smooth it out.
- Chill the cake for about 30 minutes to set the crumb coat before adding the final layer of frosting. This will help prevent any crumbs from mixing into your decorative frosting.
2. Choose the Right Tools for the Job
When it comes to frosting, the right tools can make all the difference in achieving a clean, professional finish. Using the proper equipment can help you avoid uneven frosting application and create smooth, beautiful layers.
- Offset Spatula: An offset spatula is perfect for spreading frosting evenly across the cake’s surface. Its angled design makes it easy to apply frosting without scraping off the base layer.
- Bench Scraper: A bench scraper helps smooth the sides of the cake and gives it that professional, clean look. Hold it at a 90-degree angle to the cake to achieve smooth, even frosting.
- Piping Bags: If you plan on piping intricate details like ruffles or designs, piping bags with various tips can make the process much neater and more controlled.
3. Work in Layers and Don’t Rush
One of the biggest mistakes when frosting a cake is rushing the process. Frosting the cake too quickly can lead to uneven coverage, messy application, and frustration. Instead, work in layers to achieve the perfect finish.
- Start with a Thin Layer: Apply a thin base layer first, then add more frosting as needed. This prevents the cake from getting overwhelmed with frosting at once and allows you to create a smoother finish.
- Take Your Time: If you’re working with multiple colors or intricate designs, take your time. This isn’t a race—by moving slowly and with care, you’ll have much more control over your frosting application.
4. Smooth the Frosting for a Polished Look
Once your frosting is applied, it’s time to smooth it out. If you’re looking for that clean, professional appearance, smoothing is key to avoiding a messy finish.
- Use a Warm Spatula: A warm spatula or bench scraper can help smooth out the frosting and remove any streaks. Dip the spatula in warm water, dry it off, and gently smooth over the frosting for a sleek surface.
- Rotate the Cake: If you’re using a turntable, rotate the cake as you work, allowing you to smooth out the frosting evenly around the entire cake. This gives you complete control over the process and ensures an even finish.
5. Handling Frosting Color and Texture
Sometimes messy frosting is the result of using the wrong frosting consistency or color. If your frosting is too runny, it can drip down the sides of the cake, creating an uneven and unappealing look. If it’s too stiff, it might be hard to spread smoothly.
- Adjust Frosting Consistency: Make sure your frosting is the right consistency for spreading or piping. For spreading, it should be soft but firm enough to hold its shape. If your frosting is too runny, add a little powdered sugar; if it’s too thick, add a bit of milk or cream.
- Use Gel Food Coloring: To achieve vibrant, clean colors without affecting the frosting’s texture, always use gel food coloring. It’s more concentrated and won’t thin out the frosting like liquid food coloring can.
Pro Tips:
- Don’t Overload Your Spatula: When applying frosting, don’t load your spatula with too much at once. Apply in small, manageable amounts to control the frosting application better.
- Clean Your Tools Frequently: Wipe your spatula and piping tips after each use to prevent smudges and build-up of frosting on the edges.
- Chill Between Layers: If you’re working with multiple layers of frosting, chill the cake between each application to make the process easier and cleaner.
With these simple yet effective tips, you can take the stress out of frosting your unicorn cake. By focusing on neatness, patience, and the right tools, you’ll have a beautifully frosted cake that looks as good as it tastes. Remember, the process is all about finesse—so take your time, enjoy the journey, and watch your magical cake come to life!
Bonus Tips for Hosting a Unicorn-Themed Party
Matching Party Decorations for Your Unicorn Cake
A unicorn cake is already a showstopper, but when paired with the right party decorations, it transforms your celebration into a magical experience. Whether you’re hosting a birthday party, baby shower, or any whimsical event, coordinating your cake with your decorations elevates the overall theme and makes everything come together beautifully. Let’s dive into some simple, fun ways to match your unicorn cake with the perfect party décor.
1. Color Coordination: Bold and Magical
The most obvious way to match your unicorn cake to the party decorations is through color. Unicorns are known for their rainbow manes, so incorporating pastel hues and vibrant shades will create an enchanting atmosphere. You can choose a pastel color palette or go for a full-on rainbow effect—whatever feels most magical to you!
- Pastel Balloons: Soft pastel-colored balloons (think pink, lavender, mint, and pale blue) are a perfect match for your unicorn cake. They add a touch of whimsy without overwhelming the scene.
- Rainbow Accents: To really bring the magic to life, consider rainbow banners, streamers, or paper lanterns. These decorations not only echo the unicorn theme but also make the space feel festive and fun.
2. Unicorn-Themed Tableware
Now, let’s talk about your party table setup! Coordinating your tableware with the theme makes everything feel cohesive and complete.
- Unicorn Plates and Cups: Opt for plates, napkins, and cups adorned with unicorns, rainbows, or stars. These little touches help tie the whole theme together without competing with the cake’s design.
- Gold or Silver Cutlery: Add a bit of sparkle with gold or silver utensils. These shimmering accents complement the magical feel of the unicorn cake and elevate your table settings.
- Unicorn Centerpieces: You can even go the extra mile and create unicorn-inspired centerpieces for the table. Think of mini unicorn figurines, colorful flowers, or sparkly candles placed around the cake to make it the center of attention.
3. Sparkles and Glitter Everywhere!
A unicorn cake is naturally a glittery treat, so it only makes sense to bring some sparkle into your party decorations. Adding glitter or shimmer to your décor will enhance the magical, dreamlike ambiance that a unicorn cake naturally evokes.
- Glittery Tablecloths or Runners: Use a glittery tablecloth or runner to reflect the shimmer of your cake’s frosting. It will give your table an elegant yet playful vibe, perfect for a unicorn-themed celebration.
- Sparkling Confetti: Scatter rainbow-colored or silver confetti on the party table to add an extra touch of sparkle. This will match the edible glitter on your cake and create a cohesive look across the room.
- Twinkling Fairy Lights: String up fairy lights or LED lights around the cake area to mimic the soft glow of a magical unicorn world. The warm light will make your cake and decorations shine even more!
4. Creative Cake Stands and Displays
A well-chosen cake stand or display can really elevate the visual appeal of your unicorn cake and tie into your theme.
- Gold or Silver Cake Stand: A sleek gold or silver cake stand works beautifully for showcasing your unicorn creation. It complements the whimsical vibe while adding a bit of elegance to the setup.
- Pastel Pedestal Stands: If you want something a little more colorful, a pastel-colored cake pedestal can be the perfect way to match your cake’s color scheme and make it pop.
5. Party Favors to Match the Theme
Don’t forget about party favors! Sending guests home with magical unicorn-themed goodies is the perfect way to wrap up your celebration.
- Unicorn Goodie Bags: Fill goody bags with unicorn stickers, plush toys, or sparkly pencils that guests will adore. Matching the bags with the cake colors keeps everything feeling cohesive.
- Unicorn Cupcake Toppers: If you plan to serve cupcakes alongside your unicorn cake, add fun unicorn cupcake toppers. They’re a great way to reinforce the theme and make each treat special.
Pro Tip:
To ensure everything ties together, consider creating a mood board or Pinterest board before the event. Collect inspiration for your cake, decorations, and party favors so you can visually map out how everything will work together. This ensures you stay on theme and create a consistent magical vibe from the cake to the smallest detail.
With these creative ideas, your unicorn cake won’t just be the star of the party—it will be part of a larger, enchanted atmosphere. Whether you’re incorporating bold colors, glitter, or unique table settings, these decoration tips will help you create a memorable and cohesive unicorn-themed celebration that everyone will remember.
Unicorn Cake Presentation Ideas: Making Your Cake the Star of the Show
When it comes to a unicorn cake, presentation is key to making it truly magical. Whether it’s for a birthday, baby shower, or any whimsical celebration, your cake deserves to shine in all its glory. Let’s explore creative and enchanting ways to present your unicorn cake that will leave your guests in awe!
1. Stunning Cake Stand Displays
A beautiful cake stand is the foundation of a perfect presentation. Elevating your unicorn cake on a stand not only gives it a grand appearance but also makes it the centerpiece of your celebration.
- Gold or Silver Pedestal Stand: For a sophisticated yet magical look, a gold or silver pedestal stand works wonders. The reflective surface enhances the shimmer of the edible glitter and adds a touch of elegance to the overall presentation.
- Wooden or Pastel Cake Stand: If you’re going for a more rustic or soft color scheme, a wooden cake stand or a pastel-colored pedestal will complement the whimsical theme of the unicorn cake.
2. Cake Backdrop Magic
A backdrop behind the cake can elevate your entire dessert display. Whether it’s a simple decoration or something more elaborate, a great backdrop draws attention to the cake and adds to the atmosphere.
- Rainbow Streamers or Balloons: Hang a string of rainbow-colored streamers or balloons behind the cake for a vibrant backdrop. This adds a playful touch and emphasizes the magical theme of the unicorn cake.
- Tulle or Fabric Curtain: A soft tulle or fabric curtain in pastel colors can create a dreamy, ethereal effect behind the cake. It’s a simple, elegant option that brings out the unicorn’s mystical vibe.
- Fairy Lights: Twinkle lights strung around the backdrop can bring a sparkling, fairy-like glow to the scene, making the cake appear as though it’s part of a magical world.
3. Create a Unicorn Cake Scene
Don’t just stop at the cake itself—create a scene around it that reinforces the theme. This immersive approach will wow your guests and make the cake feel like it’s part of something much larger.
- Unicorn Figurines and Decorations: Place small unicorn figurines or themed decorations around the base of the cake. Whether it’s glittery unicorns, tiny clouds, or rainbow-colored elements, these playful touches add personality and charm to your setup.
- Edible Elements Around the Cake: Consider decorating the surrounding table with edible accents like colorful macarons, unicorn cupcakes, or even mini unicorn cookies. These treats make the display feel cohesive and give your guests plenty of options to enjoy.
4. Piping Beautiful Buttercream Flowers
A simple yet effective way to present your unicorn cake beautifully is by adding intricate buttercream flowers around the base or on top of the cake. Not only will this enhance the cake’s appearance, but it’ll also tie the design together.
- Buttercream Ruffles: Piping soft buttercream ruffles in rainbow shades around the base of the cake or on the top tiers can make it look elegant and vibrant.
- Flower Accents: Small buttercream flowers, such as roses and daisies, placed delicately on the cake’s surface can provide a charming, whimsical touch that complements the magical unicorn theme.
5. Incorporate Edible Glitter and Sparkles
What’s a unicorn cake without some shimmer? Adding a little edible glitter can instantly transform your cake into a sparkling, enchanted treat.
- Edible Glitter on Frosting: Lightly dust the top of the cake with edible glitter to give it a shimmering effect. This adds depth and a playful sparkle that catches the light, making your cake look even more magical.
- Sparkly Cake Toppers: You can also opt for glittery unicorn cake toppers, such as horn figurines, stars, or rainbows. These toppers can make the cake even more whimsical and will tie into the glittery theme perfectly.
6. Create a Colorful Dessert Table
Don’t limit your creativity to just the cake—extend it to the entire dessert table! A well-designed dessert table can make the unicorn cake truly shine.
- Candy and Treats in Matching Colors: Serve treats in the same pastel rainbow shades as your cake—think macarons, jellybeans, or cotton candy. These will complement the cake and bring a sense of unity to the display.
- Unicorn-Themed Containers: Use candy jars, bowls, and plates with unicorn designs to store your sweets. This keeps the theme running through the entire dessert spread and makes for adorable photo opportunities.
7. Personalize with a Custom Cake Topper
Add a personalized touch to your unicorn cake with a custom cake topper. This can be something unique to the event or person celebrating.
- Name or Age Cake Topper: A cute name or age topper, perhaps made from edible sugar or acrylic, adds a personal element to the cake presentation.
- Custom Unicorn Horn: If you’re feeling extra creative, you can create a custom unicorn horn topper with colorful edible flowers or a small sugar unicorn figurine to sit atop your cake.
Pro Tip:
Before presenting your cake, take a moment to step back and assess the entire setup. Look at the table, the decorations, and the cake itself. Adjust where needed, so your cake stands out and gets the attention it deserves. And don’t forget to snap a photo for memories before it gets devoured!
With these presentation ideas, your unicorn cake will not only taste magical but will also look like a work of art. These simple yet creative touches will ensure your cake is the star of the party and leaves guests with awe-inspired memories.
DIY Unicorn Party Favors: Magical Keepsakes for Your Guests
No unicorn-themed party is complete without some fun and memorable party favors! Giving guests magical, DIY unicorn-inspired keepsakes is a great way to send them home with a piece of the enchantment. These thoughtful and easy-to-make party favors will not only delight your guests but also add a personal touch to your celebration. Let’s dive into some creative and simple DIY unicorn party favor ideas that are sure to add sparkle to any occasion!
1. Unicorn-Themed Goodie Bags
Goodie bags are always a hit, and when they’re filled with magical unicorn treats, they become even more special. You can easily create your own unicorn-themed goodie bags with a few simple materials.
- Materials Needed:
- Small clear or pastel-colored bags
- Unicorn stickers or printable labels
- Rainbow-colored candy (think jelly beans, gummies, or lollipops)
- Mini unicorn figurines or keychains
- Tissue paper in pastel colors
- How to Make It:
- Fill the bag with rainbow-colored candy, and tuck in a mini unicorn figurine or keychain.
- Add a few sheets of pastel tissue paper at the top for a soft touch.
- Seal the bag with a unicorn-themed sticker or print a personalized label with the guest’s name to make it extra special.
- If you’re feeling extra crafty, you can also tie a colorful ribbon around the top of the bag to complete the look!
2. Unicorn Horn Cookie Pops
Everyone loves a sweet treat, and what could be more fitting for a unicorn-themed party than unicorn horn-shaped cookies? These easy-to-make cookie pops are both adorable and delicious!
- Materials Needed:
- Sugar cookie dough (store-bought or homemade)
- Lollipop sticks
- Royal icing in pastel colors (pink, purple, yellow)
- Edible glitter or sprinkles
- Piping bags
- How to Make It:
- Roll out the sugar cookie dough and cut out unicorn horn shapes using a cookie cutter or knife.
- Bake the cookies and let them cool.
- Insert a lollipop stick into the base of each cookie while it’s still soft to create a handle.
- Once cooled, pipe royal icing onto the cookies in pastel rainbow swirls.
- Sprinkle edible glitter or colorful sprinkles on top to give them a magical touch.
- Let the cookies dry completely before packaging them in clear treat bags with a ribbon.
3. Unicorn Sparkle Bath Salts
Give your guests a little magic to take home with them in the form of DIY unicorn sparkle bath salts. These bath salts are not only easy to make but also a great way to let your guests unwind after the party.
- Materials Needed:
- Epsom salt
- Baking soda
- Essential oils (lavender, chamomile, or peppermint)
- Food coloring (pastel pink, purple, blue)
- Glitter (optional)
- Small mason jars or plastic bags
- How to Make It:
- In a large bowl, combine 1 cup of Epsom salt, ½ cup of baking soda, and a few drops of essential oils for a soothing scent.
- Add food coloring to the mixture until you achieve your desired pastel shade. You can create multiple colors and layer them in your jars for a rainbow effect.
- For a touch of sparkle, add a pinch of glitter to the mix (make sure it’s safe for use in bath products).
- Spoon the bath salts into small mason jars or plastic bags, and seal them tightly.
- Decorate the jars with a cute unicorn sticker, a colorful ribbon, or a small tag with the scent name.
4. DIY Unicorn Slime
Unicorn slime is not only fun to make, but it’s also a hit at any party. It’s easy to customize with glitter, pastel colors, and sparkles for a truly magical party favor.
- Materials Needed:
- White school glue
- Baking soda
- Contact lens solution (containing boric acid)
- Food coloring (in pastel colors)
- Glitter (optional)
- Small containers
- How to Make It:
- Mix 1 cup of white glue with 1 tablespoon of baking soda in a bowl.
- Add a few drops of food coloring and mix until you get the desired pastel shade.
- Slowly add contact lens solution (about 1-2 tablespoons), stirring constantly until the slime begins to form.
- Once the slime comes together, knead it until it reaches the right texture.
- Add glitter to give it some sparkle, and store the slime in small plastic containers with lids.
- Add a fun unicorn sticker or charm to the container for a personalized touch!
5. Unicorn-Themed Mini Plant Pots
If you want to create a more eco-friendly and lasting favor, a mini unicorn-themed plant pot makes a charming gift. This favor adds a touch of nature and whimsy to any party.
- Materials Needed:
- Small terracotta pots
- Paint (white, pastel pink, purple, yellow)
- Paintbrushes
- Unicorn horn cutouts (you can make these with foam or cardboard)
- Small plants or succulents
- Ribbon or twine
- How to Make It:
- Paint the terracotta pots in a pastel color of your choice and let them dry.
- Once dry, paint or attach unicorn horn cutouts to the top of the pot to give them a whimsical, unicorn-inspired look.
- Add a small succulent or plant into each pot. Succulents are low-maintenance and perfect for this type of favor.
- Tie a colorful ribbon or twine around the base of the pot to complete the look.
- Add a small tag with care instructions for the plant to make the favor even more thoughtful.
Pro Tip:
To make the DIY process easier, consider prepping everything in advance so that guests can take home their favors as soon as the party winds down. You can even set up a “favor station” at the party where guests can pick their favorite unicorn-themed treat to take home!
With these DIY unicorn party favors, you’ll leave a lasting impression on your guests, giving them a magical memento that they’ll cherish long after the party ends. Whether it’s a fun treat like unicorn slime or a personalized bath salt jar, each favor will remind them of the enchanting time they had celebrating with you!
Conclusion: Your Perfect Unicorn Cake Awaits
Congratulations, you’ve made it through the steps to create the ultimate unicorn cake! With your cake layers perfectly baked, frosting expertly applied, and magical decorations in place, you now have a showstopper that will delight both kids and adults alike. The best part? You now have the secrets to making it perfect every time.
As you celebrate and share your masterpiece with loved ones, remember that the magic of a unicorn cake isn’t just in its looks—it’s in the joy it brings to those who get to indulge in its whimsical beauty. The bright colors, the fun elements, and the delicious taste combine to create an unforgettable party experience.
Pro Tip: Don’t hesitate to get creative with your toppings and decorations. Unicorn cakes are all about imagination, so don’t be afraid to personalize yours to suit your unique style. Whether you’re adding edible glitter, a fun unicorn horn, or a rainbow-inspired theme, the options are endless.
Lastly, always keep the fun and the love for baking at the heart of your kitchen. The joy of making something magical is an experience worth sharing, and your unicorn cake will always be a hit at any celebration.
Happy baking, and enjoy every sparkly bite of your unicorn creation!
Explore More Magical Recipes!
If you loved making your unicorn cake, why not dive into more enchanting treats? Check out some of our other fun and creative recipes on the blog that will add that perfect touch of magic to any celebration. From rainbow cupcakes to dreamy dessert tables, there’s always something sweet waiting for you.
Don’t miss out on more tips, tricks, and inspiration to make your baking even more exciting. Happy baking, and we can’t wait to share more magical moments with you! ✨