 Save
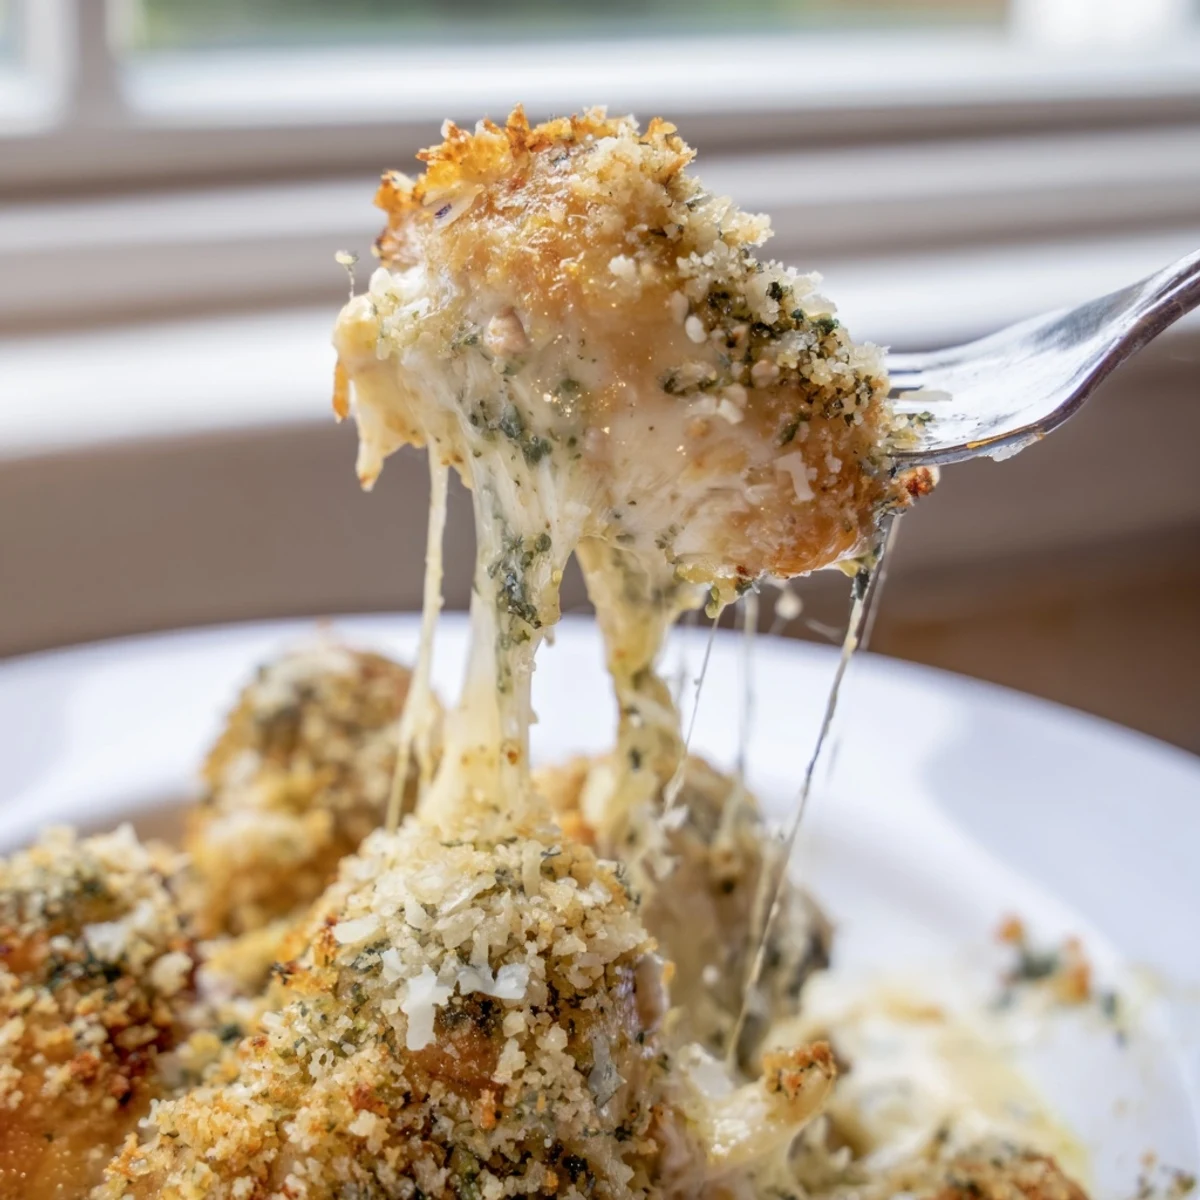
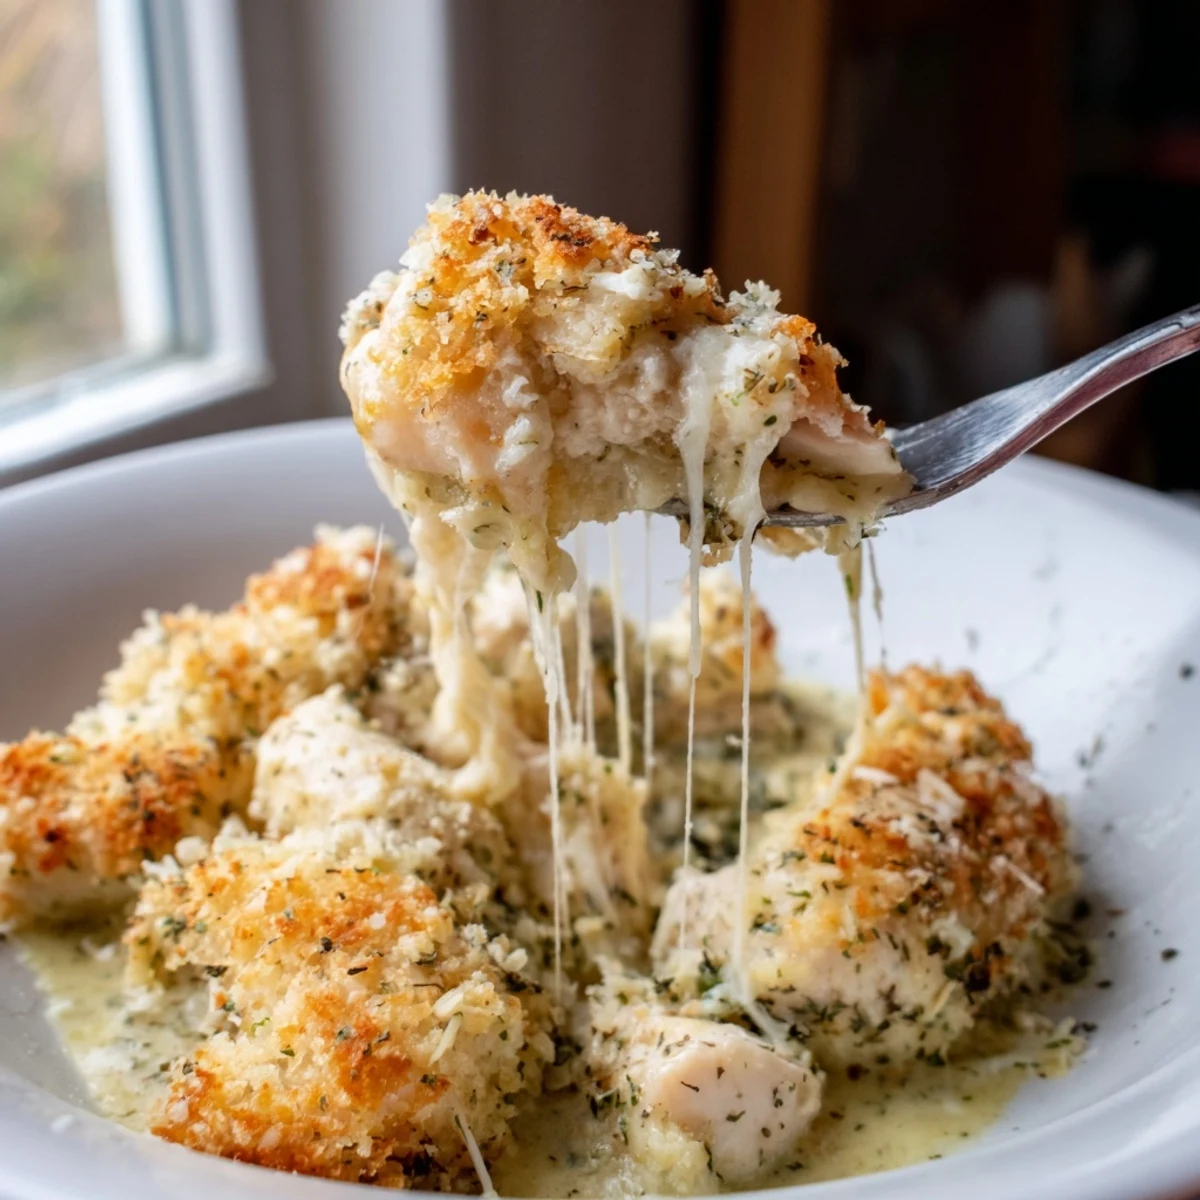
Save This Chicken Kiev Casserole transforms the beloved Eastern European classic into a effortless baked dish. Tender pieces of boneless chicken are nestled in a creamy garlic-herb butter sauce, topped with a generous layer of golden panko breadcrumbs. Each serving delivers the signature flavors of traditional Chicken Kiev — rich butter, fragrant garlic, and fresh herbs — in a comforting, family-sized format.
Ready in just under an hour with minimal prep, this casserole is perfect for busy weeknights or casual gatherings. The creamy base pairs beautifully with the crunchy topping, creating an irresistible texture contrast.
The smell of garlic butter melting into chicken is one of those things that makes everyone wander into the kitchen asking when dinner will be ready. My neighbor actually knocked on my door once while this was in the oven, claiming she could smell it from her hallway. This casserole takes everything people love about Chicken Kiev and turns it into something you can make on a Tuesday without pounding meat flat.
I made this for a friend who was going through a rough week, and she sat at my kitchen counter eating straight from the dish with a fork before I even had plates out. That is when you know a recipe is worth keeping.
Ingredients
- Boneless skinless chicken breasts (1.5 lbs): Cut into bite sized pieces so every forkful gets coated in that buttery sauce.
- Unsalted butter (6 tbsp, softened): You need it soft enough to mix with the herbs but not melted into a puddle.
- Garlic (3 cloves, minced): Fresh garlic only here, the jarred stuff will not give you the same punch.
- Fresh parsley (2 tbsp, finely chopped): Flat leaf or curly both work, just make sure it is actually fresh.
- Fresh dill (1 tbsp, optional): This is what gives it that Eastern European character and I highly recommend not skipping it.
- Lemon juice (1 tsp): Just a squeeze to brighten everything up and cut through the richness.
- Salt and black pepper: Seasoning the butter mixture directly means the flavor gets distributed everywhere.
- Heavy cream or half and half (1 cup): This is the base of your sauce and whole milk will be too thin.
- Low sodium chicken broth (1/2 cup): Adds depth without making it overly salty since the cheese adds salt too.
- Grated Parmesan cheese (1/4 cup): A little goes a long way and it helps thicken the sauce as it bakes.
- Panko breadcrumbs (1 cup): These stay crispier than regular breadcrumbs and that contrast is everything.
- Melted butter (2 tbsp, for topping): Coats the panko so it toasts instead of drying out.
- Dried thyme or parsley (1/2 tsp): A quiet background herb that ties the topping to the filling.
- Shredded mozzarella (1/2 cup, optional): Adds a stretchy cheese pull moment that makes this feel like comfort food on another level.
- Nonstick cooking spray or oil: For greasing the dish so nothing sticks to the edges.
Instructions
- Get your oven ready:
- Preheat to 375 degrees and lightly grease your baking dish so cleanup is painless later.
- Make the garlic herb butter:
- Mash together the softened butter, garlic, parsley, dill, lemon juice, salt, and pepper until it looks like a fragrant green flecked paste. Taste it on your finger because that little test tells you everything.
- Lay down the chicken:
- Spread the chicken pieces evenly across the bottom of the dish in a single layer so they cook uniformly.
- Dot with butter:
- Spoon small dollops of the herb butter all over the chicken and do not worry about being neat about it.
- Pour the liquids:
- Slowly pour the cream and broth over everything, then scatter the Parmesan across the top. The liquid will look like too much but it thickens as it bakes.
- Add the mozzarella if using:
- Sprinkle it on now and resist the urge to add more than the recipe calls for.
- Build the crust:
- Toss the panko with melted butter and dried herbs until every crumb glistens, then spread it in an even layer over the entire dish.
- Bake until golden:
- Slide it into the oven for 30 to 35 minutes until the top is deeply golden and the sauce is bubbling around the edges.
- Let it rest:
- Give it five minutes before serving so the sauce has time to settle and stop being molten lava.
 Save
Save One winter evening my daughter asked for seconds before she finished her first plate, and I realized this dish had quietly become our family favorite without me even noticing.
What to Serve Alongside
A simple green salad with a vinaigrette cuts through the richness perfectly. Roasted broccoli or green beans also work if you want something warm on the side.
Making It Your Own
Toss a handful of sauteed spinach or frozen peas between the chicken and the sauce layer if you want to sneak in some vegetables. A pinch of paprika in the breadcrumb topping adds a subtle smokiness that works surprisingly well.
Storing and Reheating
Cover leftovers tightly and refrigerate for up to three days. Reheat in the oven at 350 degrees rather than the microwave if you want the topping to stay crisp.
- Let it cool completely before covering so condensation does not make the topping soggy.
- Freeze individual portions for up to two months and bake from frozen at 375 for about 25 minutes.
- Always check that the center is heated through before serving leftovers.
 Save
Save This is the kind of recipe that makes people think you spent all day cooking when really you just threw everything in a dish. That is the best kind of cooking there is.
Recipe FAQs
- → Can I use chicken thighs instead of chicken breasts?
-
Yes, boneless skinless chicken thighs work wonderfully in this casserole. They remain juicier and more forgiving during baking. Adjust the cooking time by a few minutes if needed, as thighs may take slightly longer to cook through.
- → How do I store and reheat leftovers?
-
Store leftovers in an airtight container in the refrigerator for up to 3 days. To reheat, cover with foil and warm in a 350°F oven for about 15-20 minutes. This helps the topping stay slightly crisp rather than becoming soggy in the microwave.
- → Can I assemble this casserole ahead of time?
-
Absolutely. You can assemble the entire casserole (without the breadcrumb topping) and refrigerate it for up to 24 hours before baking. Add the panko topping just before putting it in the oven to maintain its crunch.
- → What sides pair well with Chicken Kiev Casserole?
-
This rich, creamy casserole pairs well with lighter sides like a simple green salad, steamed green beans, or roasted asparagus. Mashed potatoes or buttered egg noodles also complement the dish beautifully for a heartier meal.
- → Can I make this casserole gluten-free?
-
Yes, simply substitute the panko breadcrumbs with gluten-free breadcrumbs. Check that your chicken broth is also certified gluten-free. All other ingredients in the dish are naturally gluten-free.
- → Why is my breadcrumb topping not crispy?
-
The topping needs melted butter to crisp properly — make sure to coat the panko evenly. If the topping browns too quickly, tent the dish loosely with foil for the remaining bake time. Using the broiler for the last 1-2 minutes can also help achieve a golden crunch.
