 Save
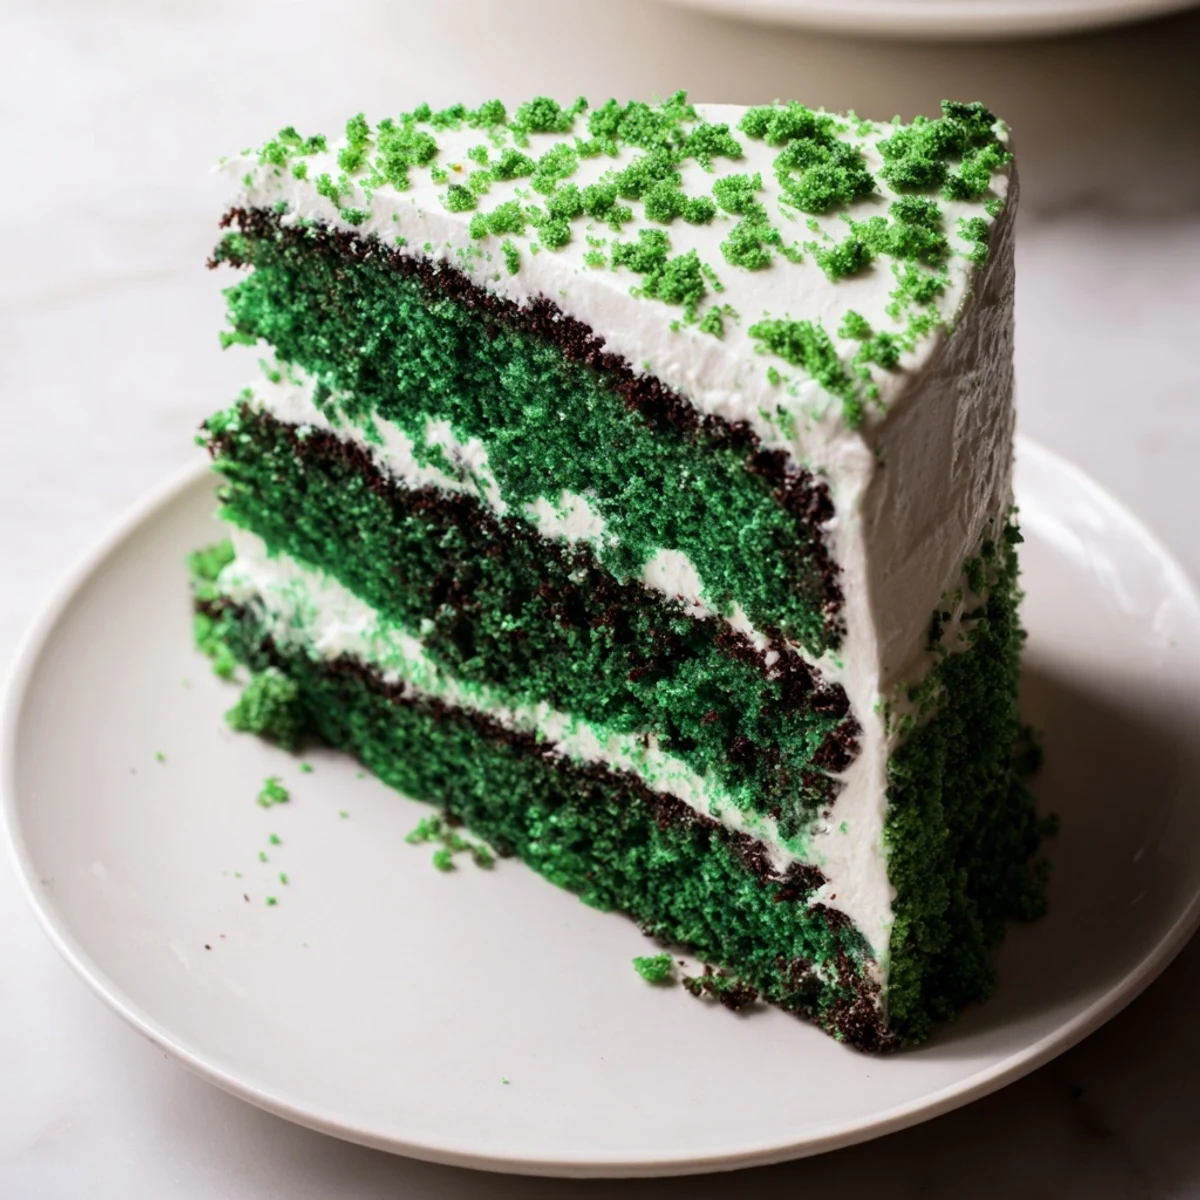
Save This eye-catching dessert features striking emerald tiers with subtle cocoa depth, crowned with luscious cream cheese frosting. The vibrant crumb delivers tender, moist texture while buttermilk adds traditional velvet cake tang. Each slice balances sweetness with creamy richness, making it an unforgettable centerpiece for spring celebrations and holiday tables.
The first time I pulled this vibrant green beauty from the oven, my kitchen looked like a St. Patrick's Day explosion. I'd been aiming for something different than the usual red velvet, and the emerald hue that emerged felt almost magical against the white cooling racks. My daughter walked in, eyes wide, and declared it the Grinch cake—a nickname that somehow stuck. We sliced into it that evening, and the slight cocoa undertone made everyone pause mid bite.
I made this for my book club last March, partly as a joke and partly because I was curious if green food coloring could actually taste good. The women spent five minutes just taking pictures before anyone would try a slice. Now every time March rolls around, my friend Sarah texts me asking if the green cake is making an appearance. It has somehow become tradition without me even trying.
Ingredients
- 2½ cups all purpose flour: The flour provides structure, but do not overmix or the cake becomes tough instead of tender
- 2 tbsp unsweetened cocoa powder: Just enough to give depth without overpowering the delicate vanilla base
- 1 tsp baking soda: This reacts with the buttermilk and vinegar for that signature velvet texture
- ½ tsp salt: Essential for balancing sweetness and bringing out flavors
- 1½ cups granulated sugar: Creamed with oil rather than butter for an unusually moist crumb
- 1 cup vegetable oil: Oil keeps this cake tender for days unlike butter based versions
- 2 large eggs room temperature: Room temperature eggs incorporate better creating a more even texture
- 1 cup buttermilk room temperature: The acidity reacts with baking soda for lift and tenderness
- 2 tsp pure vanilla extract: Do not skimp here as it is the primary flavor note
- 1 tsp white vinegar: Enhances the buttermilks tang and activates the leavening
- 1–1½ tbsp green gel food coloring: Gel coloring provides that intense emerald shade without thinning the batter
- 8 oz cream cheese softened: Use full fat brick cream cheese not the tub kind for the best frosting texture
- ½ cup unsalted butter softened: Butter gives the frosting structure while cream cheese provides tang
- 3½ cups powdered sugar sifted: Sifting prevents lumps that would mar the silky finish
- 2 tsp vanilla extract: Fresh vanilla in the frosting makes all the difference
- Pinch of salt: A tiny pinch cuts the sweetness and rounds out the frosting flavor
Instructions
- Preheat and prep your pans:
- Set your oven to 350°F and grease two 9 inch rounds with butter then line with parchment. This cake sticks easily so do not skip the parchment.
- Whisk the dry ingredients:
- In a medium bowl combine flour cocoa baking soda and salt. Set this aside while you work on the wet ingredients.
- Beat sugar and oil:
- In a large bowl mix the sugar and oil until well combined. Add eggs one at a time beating after each addition.
- Add liquids and color:
- Pour in buttermilk vanilla vinegar and green gel coloring. Whisk until the batter turns a uniform shocking green throughout.
- Combine wet and dry:
- Add the flour mixture in two batches folding gently just until no streaks remain. Overmixing will make the cake dense.
- Bake the layers:
- Divide batter between the prepared pans and bake for 28 to 32 minutes. The cakes are done when a toothpick comes out clean.
- Cool completely:
- Let the layers cool in their pans for 10 minutes then turn onto wire racks. Wait until entirely cool before frosting or the icing will melt.
- Make the frosting:
- Beat cream cheese and butter until smooth then add powdered sugar vanilla and salt. Whip until light and fluffy.
- Frost the cake:
- Place one layer on your serving plate spread with frosting then top with the second layer. Coat the entire cake and decorate as desired.
 Save
Save Last year I brought this cake to a potluck and watched adults act like children over the color. Someone actually asked if I had used spinach, which honestly is not the worst idea I have ever heard. But mostly it was just the joy of something unexpected on the dessert table that made people smile before they even took a bite.
Getting That Perfect Green Color
I have learned that gel coloring behaves completely differently than the liquid drops most of us grew up using. Start with one tablespoon and add more only if needed because you can always add color but you cannot take it back. The batter will look darker in the bowl than it will in the baked cake, so account for some lightening during baking.
Frosting Like a Pro
The secret to bakery smooth frosting is a chilled cake and a hot offset spatula. After frosting the cake, dip your spatula in hot water and wipe it dry then smooth the frosting in long continuous strokes. The gentle heat melts the surface just enough to erase any knife marks.
Make Ahead and Storage
This cake actually improves on the second day as the flavors meld and the moisture redistributes. Wrap it tightly or store in a cake dome at room temperature for up to three days. The frosting forms a slight protective crust that keeps everything fresh.
- Freeze unfrosted layers wrapped in plastic for up to two months
- Bring all ingredients to room temperature before starting for best results
- Leftover frosted cake can be refrigerated but bring to room temp before serving
 Save
Save There is something ridiculously satisfying about slicing into an unexpectedly colored cake and watching peoples faces change. This green velvet has become my go to whenever I need to remind people that food should be fun.
Recipe FAQs
- → What gives the green velvet cake its distinctive color?
-
Green gel food coloring creates the vibrant emerald hue. Start with one tablespoon and add up to half tablespoon more until reaching your desired intensity. Gel coloring provides deeper, more saturated color than liquid alternatives.
- → Can I make this cake ahead of time?
-
Bake layers up to two days in advance, wrap tightly in plastic, and refrigerate. The frosted cake keeps well in the refrigerator for 3-4 days. Bring to room temperature for 30 minutes before serving for optimal texture and flavor.
- → What's the best way to substitute buttermilk?
-
Combine one cup of whole milk with one tablespoon white vinegar, let sit for five minutes until slightly thickened. This homemade substitute provides the necessary acidity and tenderness that traditional buttermilk contributes to velvet cake texture.
- → How do I know when the cake layers are done baking?
-
Insert a toothpick into the center—if it emerges clean or with just a few moist crumbs, the layers are ready. The tops should spring back lightly when touched, usually between 28-32 minutes at 350°F.
- → Can I freeze green velvet cake layers?
-
Wrap cooled layers completely in plastic wrap followed by aluminum foil. Freeze for up to three months. Thaw overnight in the refrigerator before frosting. For best results, frost after completely thawed.
- → What makes velvet cake different from regular cake?
-
The combination of buttermilk, vinegar, and minimal cocoa powder creates that signature tender, moist crumb. The acid reacts with baking soda for extra lift, while oil ensures richness and prevents dryness.
