 Save
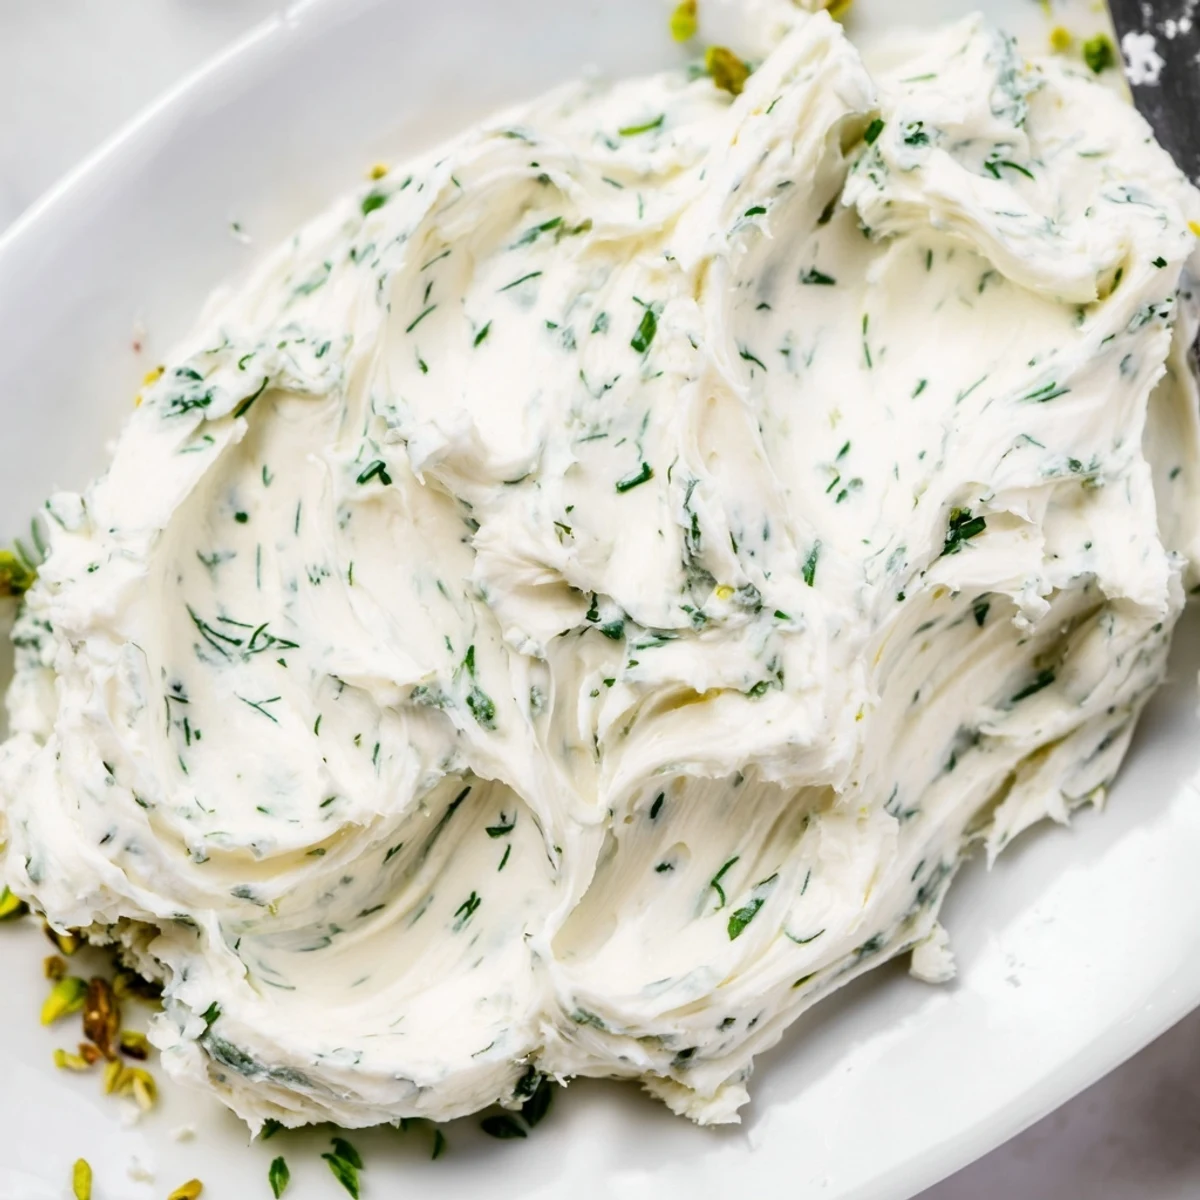
Save Whip room-temperature butter with cream cheese until light and airy, then gently fold in finely chopped chives, dill, parsley and a few thyme leaves with lemon zest, flaky salt and freshly ground pepper. Spoon the mixture onto a wooden board, create decorative swirls, and top with edible flowers, toasted nuts and a drizzle of good olive oil. Serve immediately with rustic bread, crackers or fresh vegetable slices; vegan swaps and spicy variations work well. Total time: about 15 minutes.
The first time I made a butter board, it was less a plan and more a playful experiment just as friends were about to arrive. My kitchen filled quickly with the scent of snipped chives and lemon zest mingling while I rushed to smooth butter in bold swirls across the old wooden board. There was no time for fussing or second-guessing: just me, some soft butter, and the comfortable anticipation of people talking and snacking nearby. Sometimes, the best ideas arrive when you're already halfway through making them.
I actually first set this out during an impromptu spring brunch one cloudy Saturday, after realizing at the last minute that I had a house full of bread but nothing special to go with it. My cousin arrived early and helped me slice the bread – we bickered about which knife was sharpest but agreed the butter had to be fluffy. When everyone gathered at the table, spoons clinked and people circled in for tastes before their coats were even off. It felt almost like a scene from a French painting: bread, laughter, and smears of green-flecked butter on fingertips.
Ingredients
- Unsalted high-quality butter (250 g): Using the best butter transforms every bite—let it come thoroughly to room temperature so it whips up effortlessly and is easier to spread.
- Full-fat cream cheese (60 g): This gives the butter a cloud-like texture; make sure it's softened, or you'll be fighting lumps all the way.
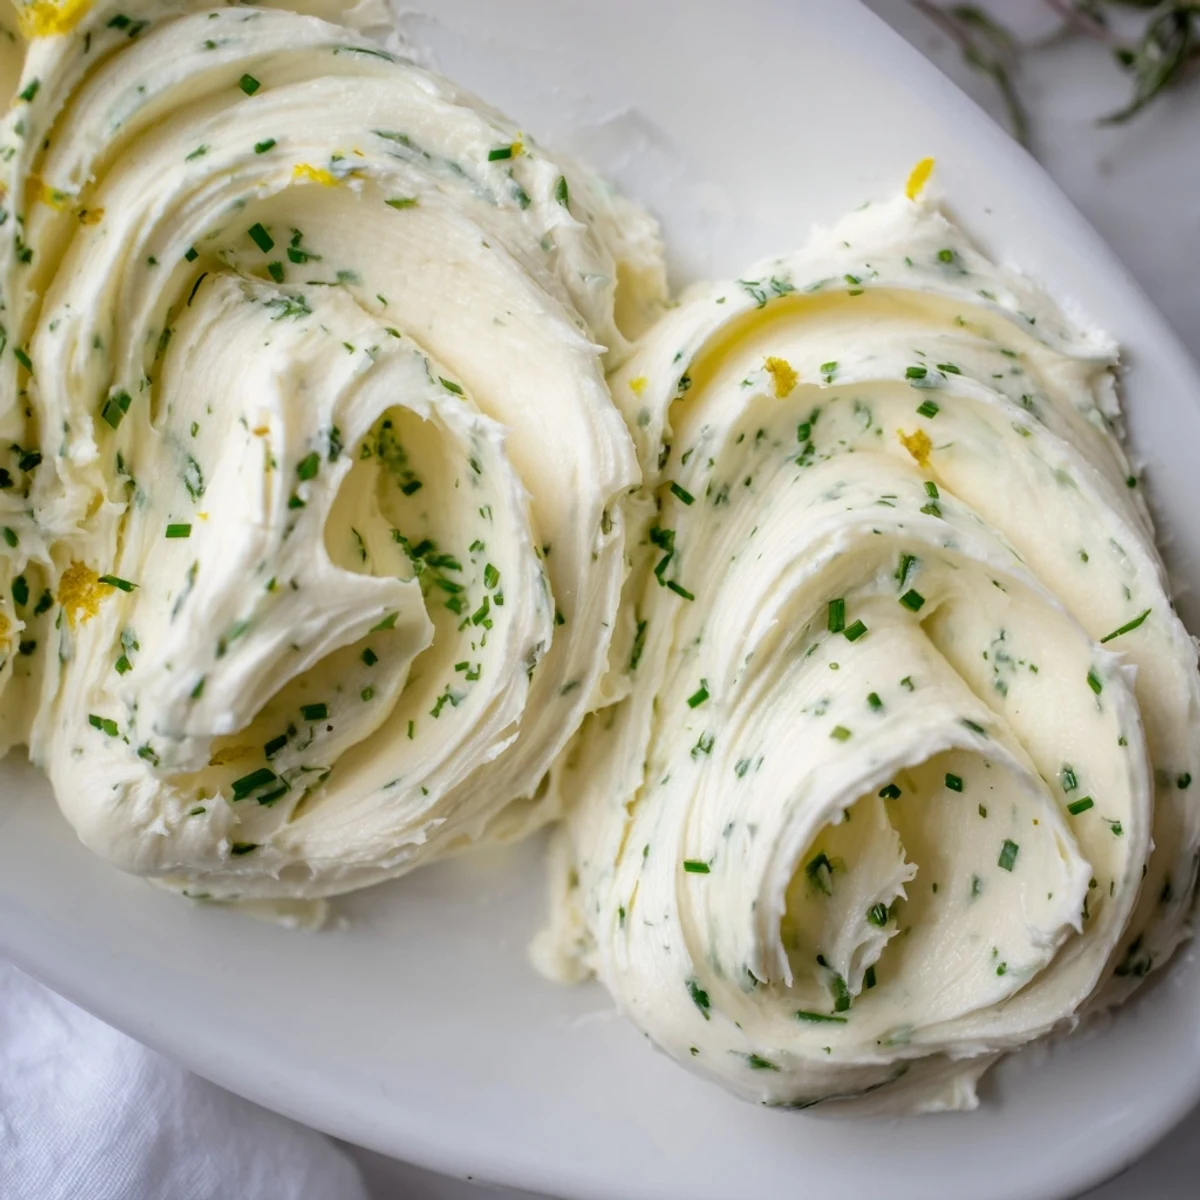
- Fresh chives (2 tbsp): Their subtle oniony bite wakes up the butter, and using scissors works way faster than a knife for mincing.
- Fresh dill (1 tbsp): Dill brings an aromatic note that makes each swipe feel a bit more special—add just before mixing to keep its flavor bright.
- Fresh parsley (1 tbsp): I chop this quite fine so you get fresh herby flavor, not big leafy bits on the board.
- Fresh thyme leaves (½ tsp): Pull off only the tender leaves; woody stems can be sneaky if you're not paying attention.
- Lemon zest (½ tsp): It adds a gentle citrus brightness—zest your lemon right over the bowl for max aroma.
- Flaky sea salt (½ tsp, plus more): Those big crystals pop on top and in the mix, so sprinkle a bit more just before serving for finishing magic.
- Freshly ground black pepper (¼ tsp): A couple of good grinds are enough; don’t overdo it or it will hide the herbs.
- Edible flowers (1 tbsp, optional): If you find them, they turn the board from simple to showpiece—add at the very end to preserve their color.
- Roasted chopped nuts (1 tbsp): I like pistachios best for color, but walnuts or pecans add great crunch; toast them ahead for fuller flavor.
- Good quality olive oil (for drizzling): Look for fruity or peppery; a light drizzle right before serving gives everything a lovely gleam.
- Rustic bread slices, crackers, or vegetable crudités: Choose sturdy dippers that won't crumble—the board gets devoured in minutes if you pick a good mix.
Instructions
- Whip It Good:
- Scoop the room-temp butter and cream cheese into a medium bowl and whip using a hand mixer (or lots of arm power with a whisk) until it's super smooth and airy—listen for that subtle swoosh sound when it's ready.
- Fold in the Flavor:
- Gently stir in the chives, dill, parsley, thyme, lemon zest, flaky salt, and black pepper until just combined—it should look marbled, not uniform, so you see streaks of green throughout.
- Style the Board:
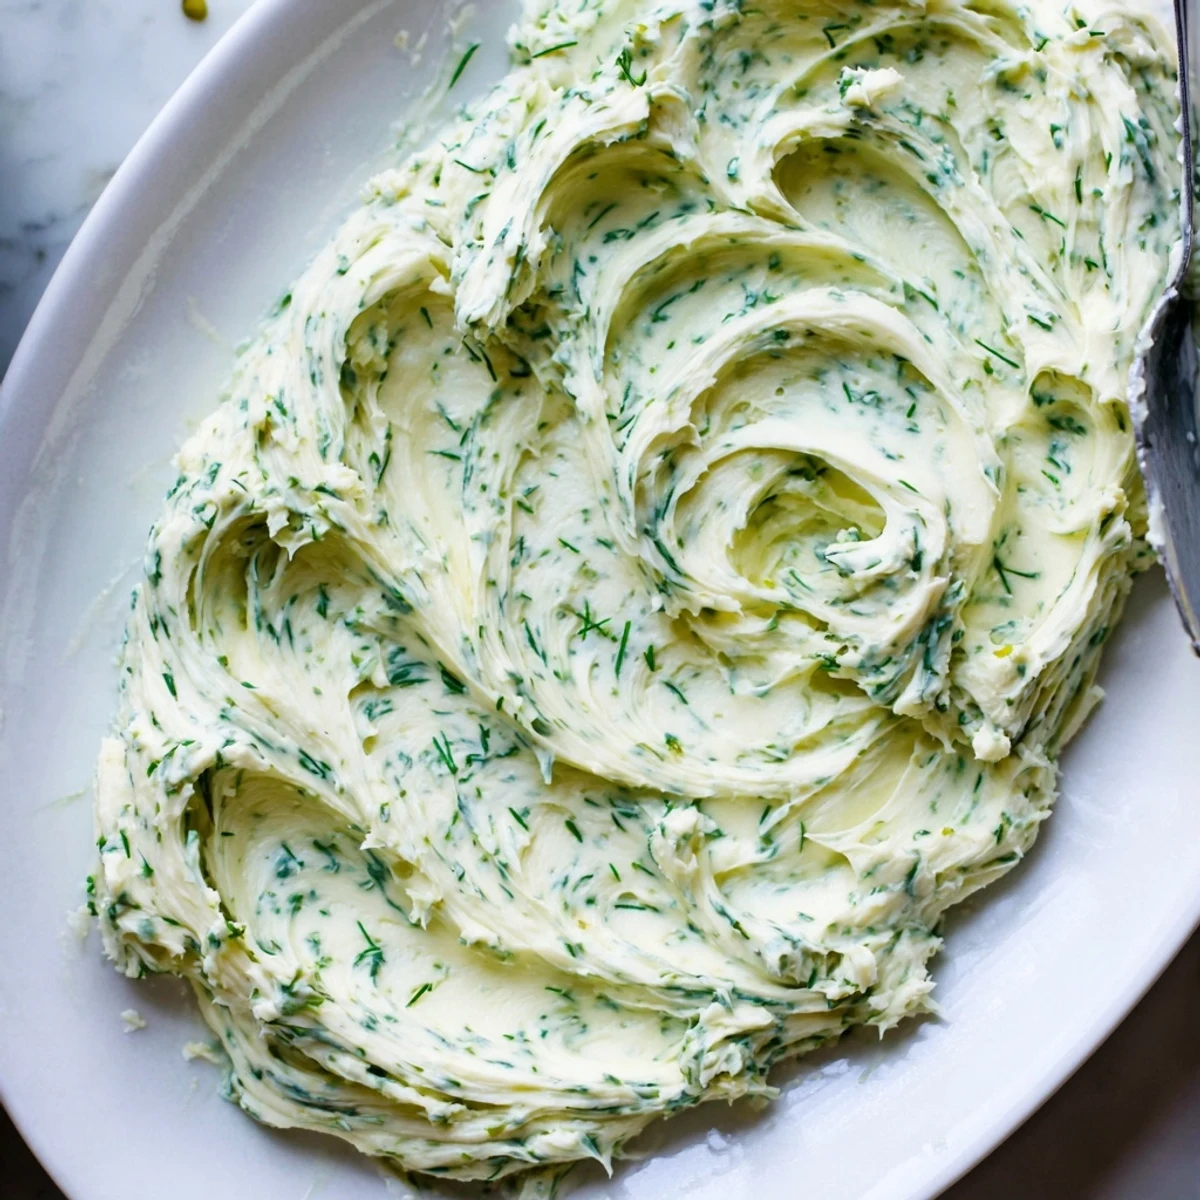
- Spoon generous dollops of the herby butter onto your serving board, then swirl it out with the back of a spoon—I like to make big swoops for dramatic effect.
- Top It Off:
- Scatter edible flowers and toasted nuts all over, add a sprinkle of flaky sea salt, and finish with a slinky drizzle of olive oil for shine.
- Serve & Graze:
- Bring out the board alongside plenty of rustic bread, crackers, and vegetable sticks—watch people light up as they dive in together.
 Save
Save This board became the talking point at my friend's garden party—not because it was fancy, but because everyone gathered around it and kept coming back for 'just one more piece'. My friend's toddler even tried to lick the board clean, which might be the highest compliment there is. It's amazing how something so simple can turn into the heart of a gathering. The memory of sharing laughs and watching the swirl marks slowly disappear still makes me grin nowadays.
Building a Butter Board That Steals the Show
The most fun part is swirling the butter—smooth it out boldly so you create all those ridges for toppings to cling to. Don't worry if it looks wild: once the nuts and flowers are scattered it transforms from rustic chaos to a work of edible art. If you feel nervous about making things look perfect, just remember everyone will be too busy eating and chatting to notice. The only real rule is to use a board big enough for everyone to reach in at once.
Swapping Flavors With the Seasons
I've played with sage and roasted garlic in autumn, and tried tarragon with citrus for spring brunches—the combinations are endless. Even the nuts can change with the mood; candied pecans are a hit during winter holidays. It's the kind of recipe you can reinvent a dozen ways and it never quite tastes the same twice. Sometimes, a pinch of chile flakes adds a gentle heat that surprises everyone at the table.
Serving, Storing, and Spreading the Joy
It's best to serve the butter board right away, so everything feels airy, bright, and fresh from the bowl. If you prep it a little earlier, just keep the board covered at room temperature and add your pretty toppings right before guests arrive. Any leftovers (rare, but it happens) are delicious slathered on toast the next morning, or even tucked into a baked potato.
- Always check for allergies—nuts and dairy can hide in surprising places.
- If the butter feels too firm just let it sit out longer—spreadability is everything.
- Keep plenty of dippers nearby: people come back for seconds (and thirds).
 Save
Save No matter the occasion, a butter board like this becomes memory-making food—quick to prep, fun to share, and always worth gathering around. I hope the first swirl you make brings a little delighted chaos to your table.
Recipe FAQs
- → How do I keep the butter spreadable without melting?
-
Use room-temperature butter and chill any ingredients that warm quickly. Work quickly when plating and serve on a cool board or place the board over a shallow tray of ice if ambient temperatures are high.
- → Can I make the herb mixture ahead of time?
-
Yes. Make and shape the whipped butter up to 24 hours ahead, cover tightly with plastic wrap and refrigerate. Bring back to room temperature for 15–30 minutes before serving to soften.
- → What are good herb substitutions or additions?
-
Swap or mix basil, tarragon, or cilantro depending on seasonality. Add minced garlic, a pinch of chili flakes for heat, or smoked paprika for depth.
- → How can I make a vegan version?
-
Use high-quality plant-based butter and a dairy-free cream cheese alternative. The whipping and folding technique remains the same; flavor adjustments may be needed as some vegan spreads are softer.
- → What toppings pair well with the butter board?
-
Edible flowers, toasted pistachios or walnuts, flaky sea salt and a drizzle of extra-virgin olive oil add texture and brightness. Fresh citrus zest lifts the flavors.
- → What should I serve alongside the butter board?
-
Offer rustic sliced bread, crackers, toasted baguette rounds or fresh vegetable sticks. Provide small spreaders and encourage guests to sample a variety of pairings.
